Annotator Display Options
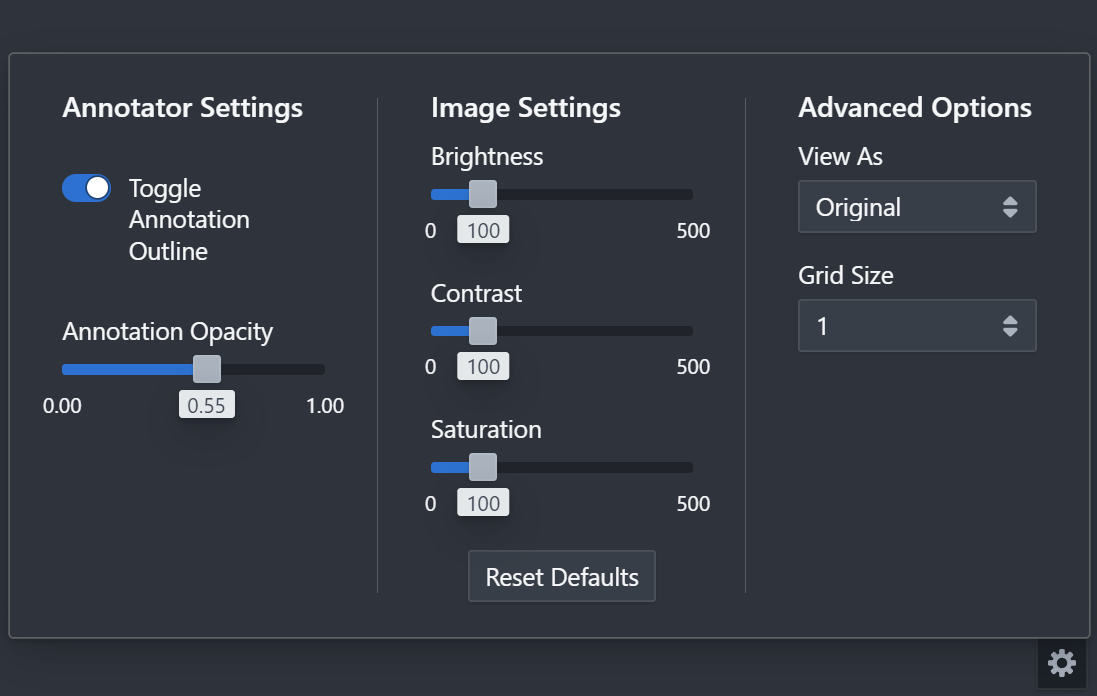
Annotator display options can be found by selecting the gear at the bottom right of the Annotator screen. These settings impact how the asset will be displayed on the annotator.

Annotator Settings
| Settings | Options | Description |
|---|---|---|
| Toggle Annotation Outline | On/Off | When it's on, annotations will have a full opaque border around them to signify the boundary of the annotator. |
| Annotation Opacity | [0.0, 1.0] | When Annotation Opacity is at 0, the filled polygon representing the annotation is entirely transparent. At 1.0, it is fully opaque. You can select any number in that range. |
Image Settings
| Settings | Options | Description |
|---|---|---|
| Brightness | [0, 500] | At brightness of 0, the whole image is black. Brightness of 100 is the default value, and it goes up to 500. |
| Contrast | [0, 500] | At contrast of 0, the whole image is grey. Contrast of 100 is the default value, and it goes up to 500. |
| Saturation | [0, 500] | At saturation of 0, the image is grayscale. The saturation is normal at 100, and goes up to 500. |
Advanced Options
| Settings | Options | Description |
|---|---|---|
| View As | - 320x320 - 640x640 - 960x960 - 1280x1280 - 1600x1600 - 1920x1920 | Changing the View As to the various options resizes the image such that the image fits into that size of a crop. This helps to understand how models with that input size can perceive the level fo detail in the image. For instance, annotating small objects in a 2000x2000 pixel image can be perceived at its original resolution but when resized to 320x320, this is unlikely to be the case. |
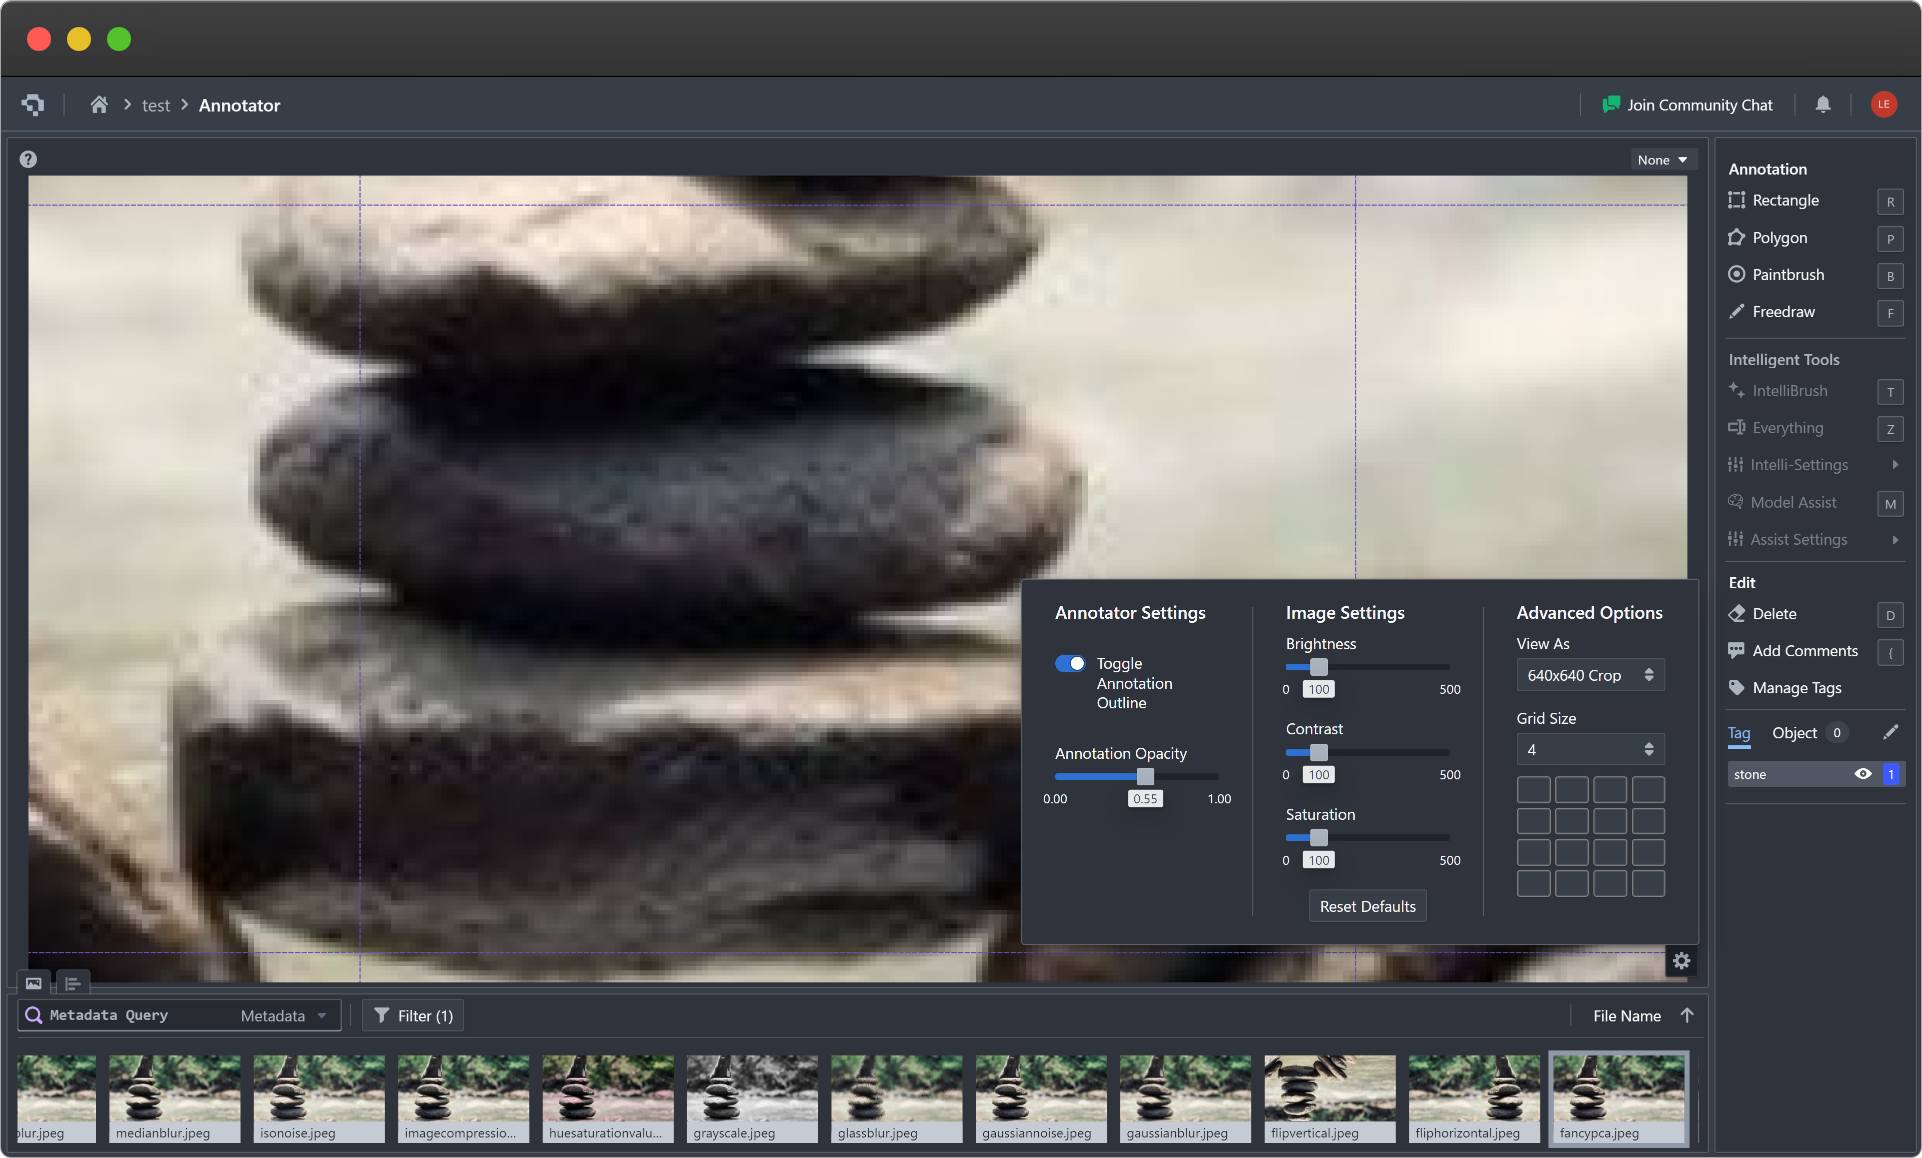
| Grid Size | [1, 8] | With various grid sizes, the image is split into a square grid with the number of squares being the grid size set. For instance, a grid size of 8 would split the image into an 8x8 grid. After selecting a grid size not equal to 1, a small grid will appear in the settings which can allow you to easily navigate to a specific grid cell by selecting one of the cells in the settings. |
Annotation Grid View
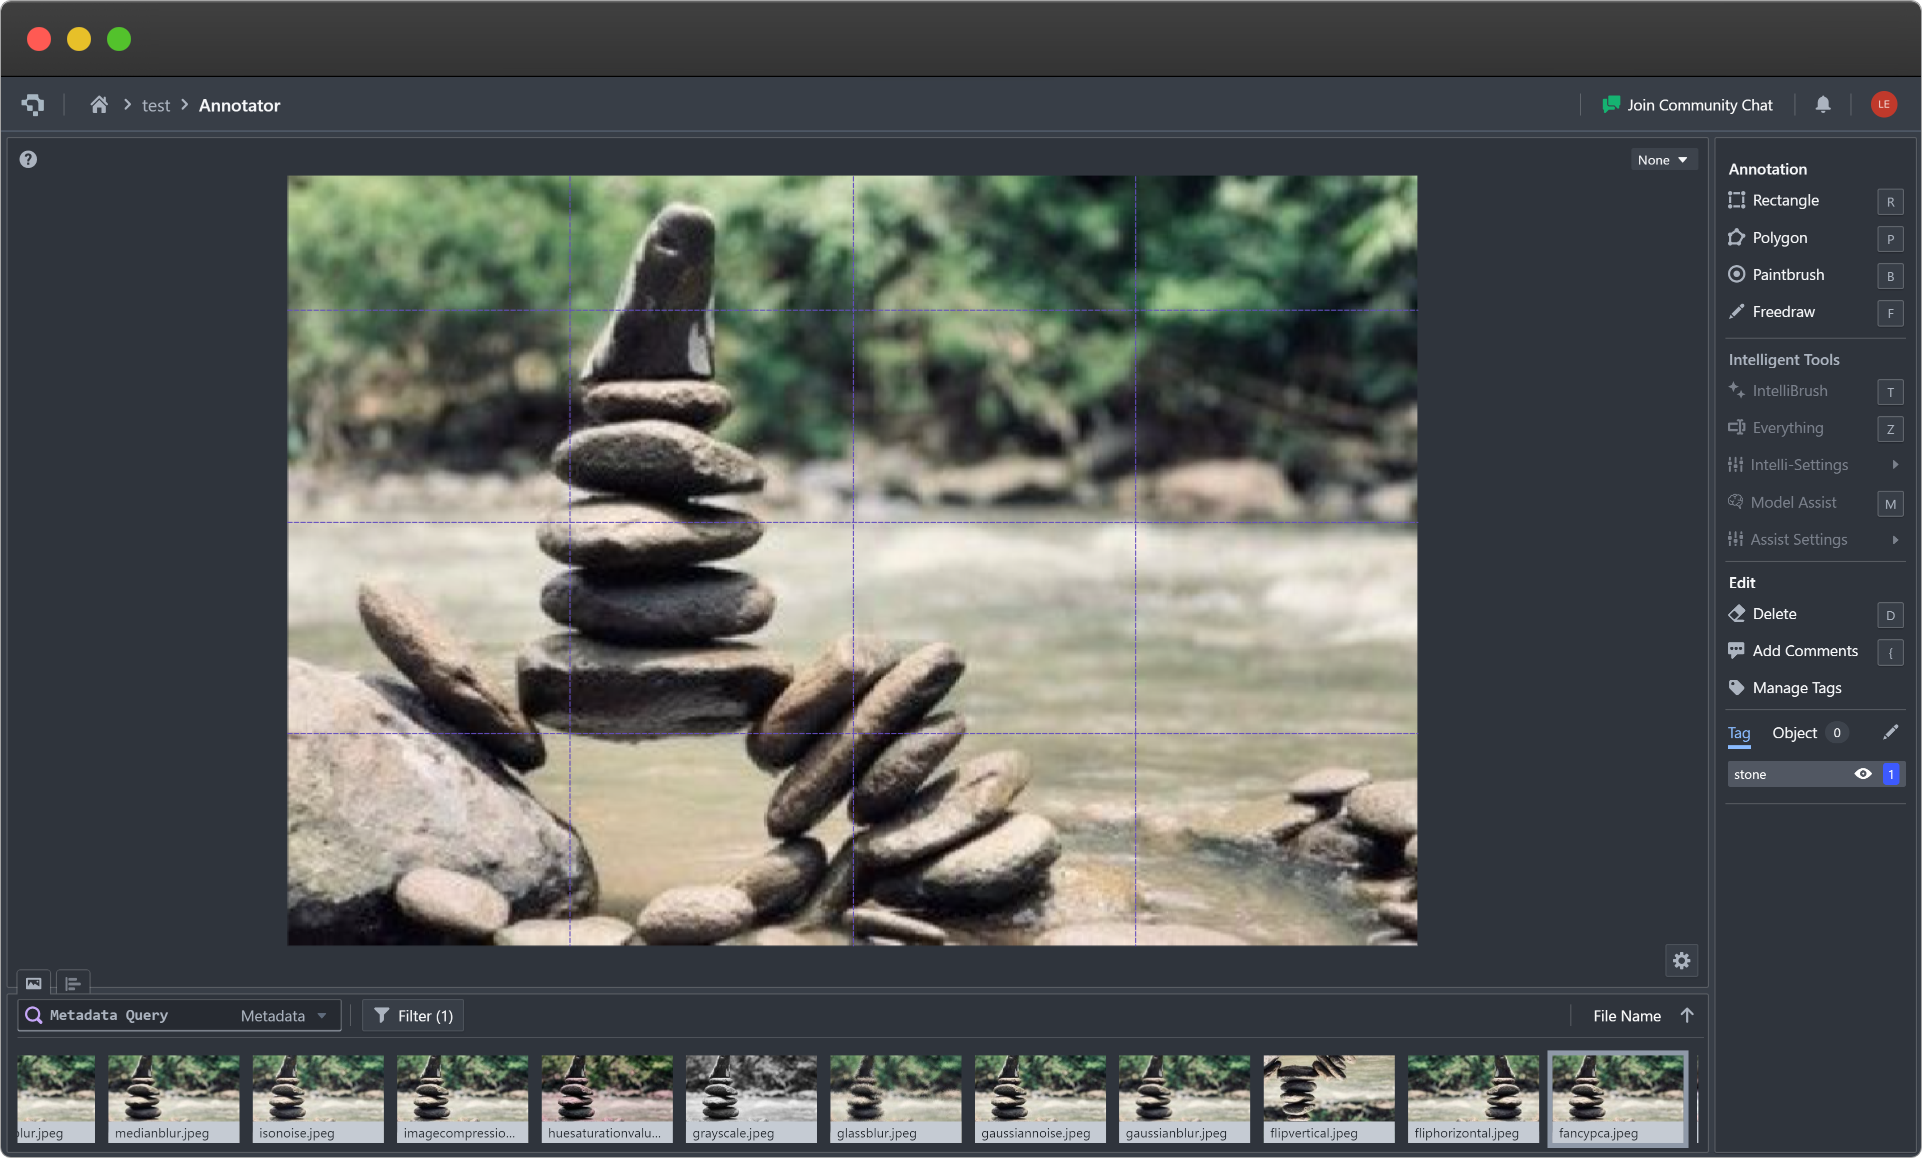
This allows you to break large images into grid cells. You can focus on a grid cell and annotate within that cell for more granularity and precision. Intellibrush also works in the context of the selected grid cell to help with precise annotation of small objects. The image below shows the grid view:

This image shows the view after having selected the cell on the third row and second column:

Common Questions
Why does the Image Settings not have a certain image transformation?
If you have an image transformation that is necessary for your industry vertical and would hugely benefit your ability to annotate, please Contact Us!
Updated 8 months ago