Deploying Your Trained Model as an API
Video Recap
- Go to the Artifacts page - This page can be found in the sidebar in your project page.
- Click on Create Deployment on your preferred artifact - Click on the ... button on the bottom right of your preferred artifact which should be Nexus stored version of your model that you want to be used for inference. For more information about which artifact you should use, go to Evaluating Model Performance. To better understand artifacts, go to Managing Trained Models.
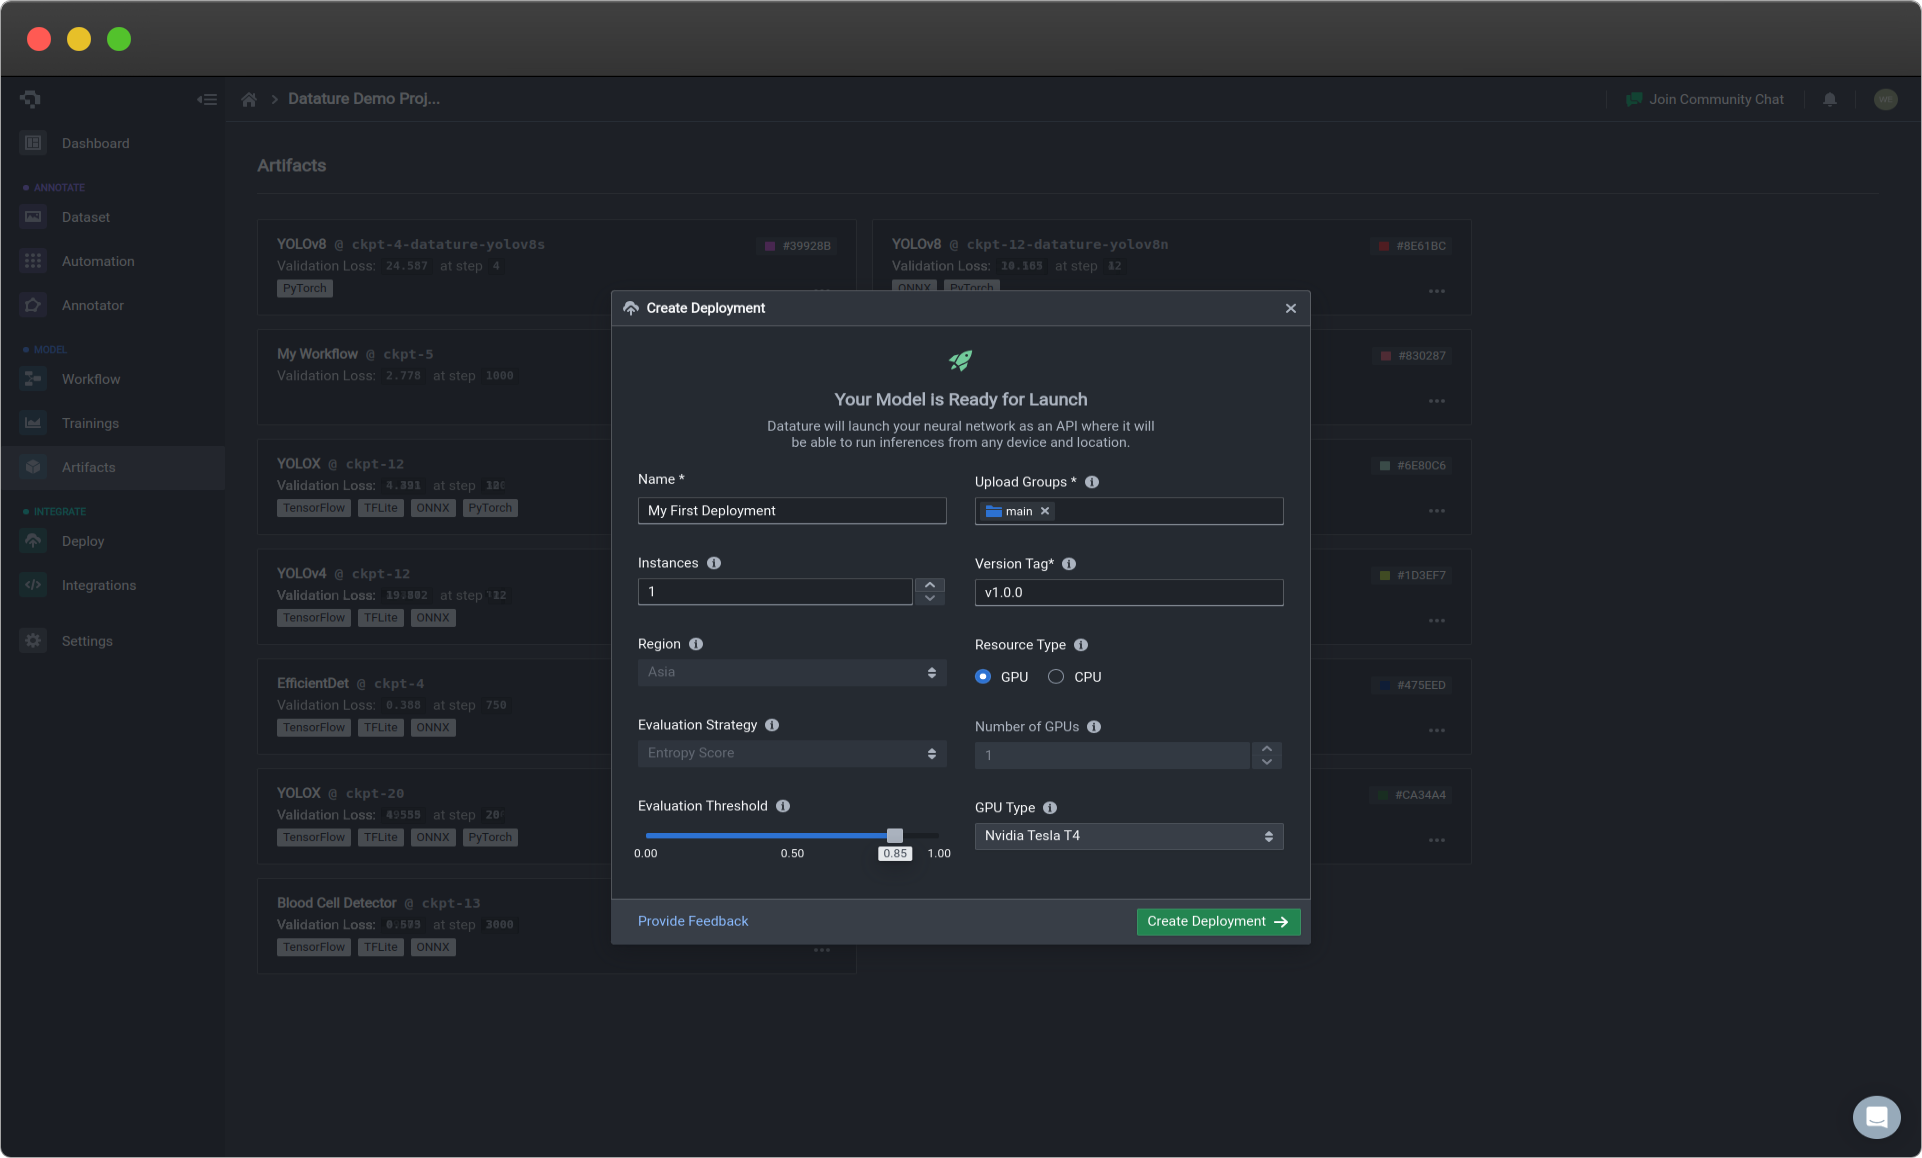
- Input a API Deployment name - A pop-up window should appear, which displays information about the API deployment. Details about that information are below. The only input required on your end to continue the process is just a name to label your deployment.
- Select Create Deployment - After selecting Create Deployment, you will be brought to the Deploy page, where it will inform you to "Stand by, we are going for launch. This process will take between 5-7 minutes". Please be patient, and you can always revisit the Deploy page from your project page to see if it is working properly.
Congratulations, you can now use your API for prediction! To see how to use your deployed API for prediction, please see Making API Calls to Your Deployed API.

The following options can be limited based on your paid plan. Please see our Plans and Pricing for more information!
API Deployment Choices
| API Deployment Menu Options | Description |
|---|---|
| Name | Your deployment name. |
| Instances | This is the number of gateways that your API will have for users to access. Select the number of instances based on scalability, redundancy, and efficient resource allocation needs. |
| Region (coming soon!) | Region in which your model is hosted. Choose a hosting location that optimises performance, meets regulatory requirements, and improves user accessibility. Currently defaults to Asia. |
| Evaluation Strategy (coming soon!) | Metric used for active learning. Choose a strategy that accounts for the dataset, model, and application, enhancing model accuracy iterations. Currently defaults to entropy score. |
| Evaluation Threshold | Threshold value for the evaluation strategy chosen above. Select an appropriate threshold to determine when a model is considered non-performant. A higher threshold requires stronger evidence to make positive predictions, and vice-versa. |
| Upload Groups | Assign assets to specific groups for processing to improve the model. |
| Version Tag | Unique version tag used for this deployment. |
| Resource Type | Select GPU for faster and more efficient inferences, while CPU is for less time-sensitive use cases. |
| GPU Type | It is the type of GPU being used that is attached to your API deployment that is ready on standby for your usage. To see more details about the differences in GPU types, go to Training Option : Hardware Acceleration. |
| Number of GPUs | It is the number of GPUs of the specified GPU type being used that is attached to your API deployment that is ready on standby for your usage. To see more details about the impact of this, go to Training Option : Hardware Acceleration. |
Common Questions
What are ways to improve my API performance?
Increasing the number of instances will allow for more users of your API to have more access points, which will reduce any time waiting on that end. Selecting more advanced GPUs and increasing the number of GPUs will improve your perfomance by speeding up the calculations made during the inference period.
👋 Need help? Contact us via website or email
🚀 Join our Slack Community
💻 For more resources: Blog | GitHub | Tutorial Page
🛠️ Need Technical Assistance? Connect with Datature Experts or chat with us via the chat button below 👇
Updated 5 months ago