
Runner Environment Setup
Please contact us to gain access to the GPU Runner feature.
Prerequisites
Root access (e.g. sudo) is required in certain steps such as configuring microk8s when installing the runner, please ensure that you have the necessary permissions. Once the runner has been set up, root access is no longer necessary.
Supported Systems
- Any Linux operating system that can run
python,microk8s, and can install NVIDIA drivers.- Recommended OS: Ubuntu ≥ 20.04 [tested!]
- At least 1 NVIDIA GPU present in the target system with compatible NVIDIA drivers installed (≥ 515, ≤ 550).
Packages
Python ≥ 3.9, ≤ 3.12
sudo apt-get update
sudo apt-get install -y python3.9 python3-pip
sudo apt-get install -y ffmpeg libsm6 libxext6
NVIDIA Drivers ≥ 515, ≤ 535 - check out the installation guide.
sudo ubuntu-drivers installNVIDIA Container Toolkit - check out the installation guide.
curl -fsSL https://nvidia.github.io/libnvidia-container/gpgkey | sudo gpg --dearmor -o /usr/share/keyrings/nvidia-container-toolkit-keyring.gpg \
  && curl -s -L https://nvidia.github.io/libnvidia-container/stable/deb/nvidia-container-toolkit.list | \
    sed 's#deb https://#deb [signed-by=/usr/share/keyrings/nvidia-container-toolkit-keyring.gpg] https://#g' | \
    sudo tee /etc/apt/sources.list.d/nvidia-container-toolkit.list

sudo apt-get update

sudo apt-get install -y nvidia-container-toolkit
Snap - check out the installation guide.
snap is a convenient package manager used to install microk8s. If you are using another method to install microk8s, or already have microk8s installed, you can skip installing snap.
sudo apt-get install snapdMicroK8s - check out the installation guide.
microk8s is used by the Runner to handle the model training and infrastructure.
sudo snap install microk8s --classic --channel=1.30

# configure microk8s permissions
sudo usermod -a -G microk8s $USER
mkdir -p ~/.kube
chmod 0700 ~/.kube
newgrp microk8s

## NOTE: you may need to restart your shell after this step if microk8s is not found ##

# enable microk8s add-ons
microk8s enable dns
microk8s enable hostpath-storage
microk8s enable nvidia
microk8s enable registry
Authentication
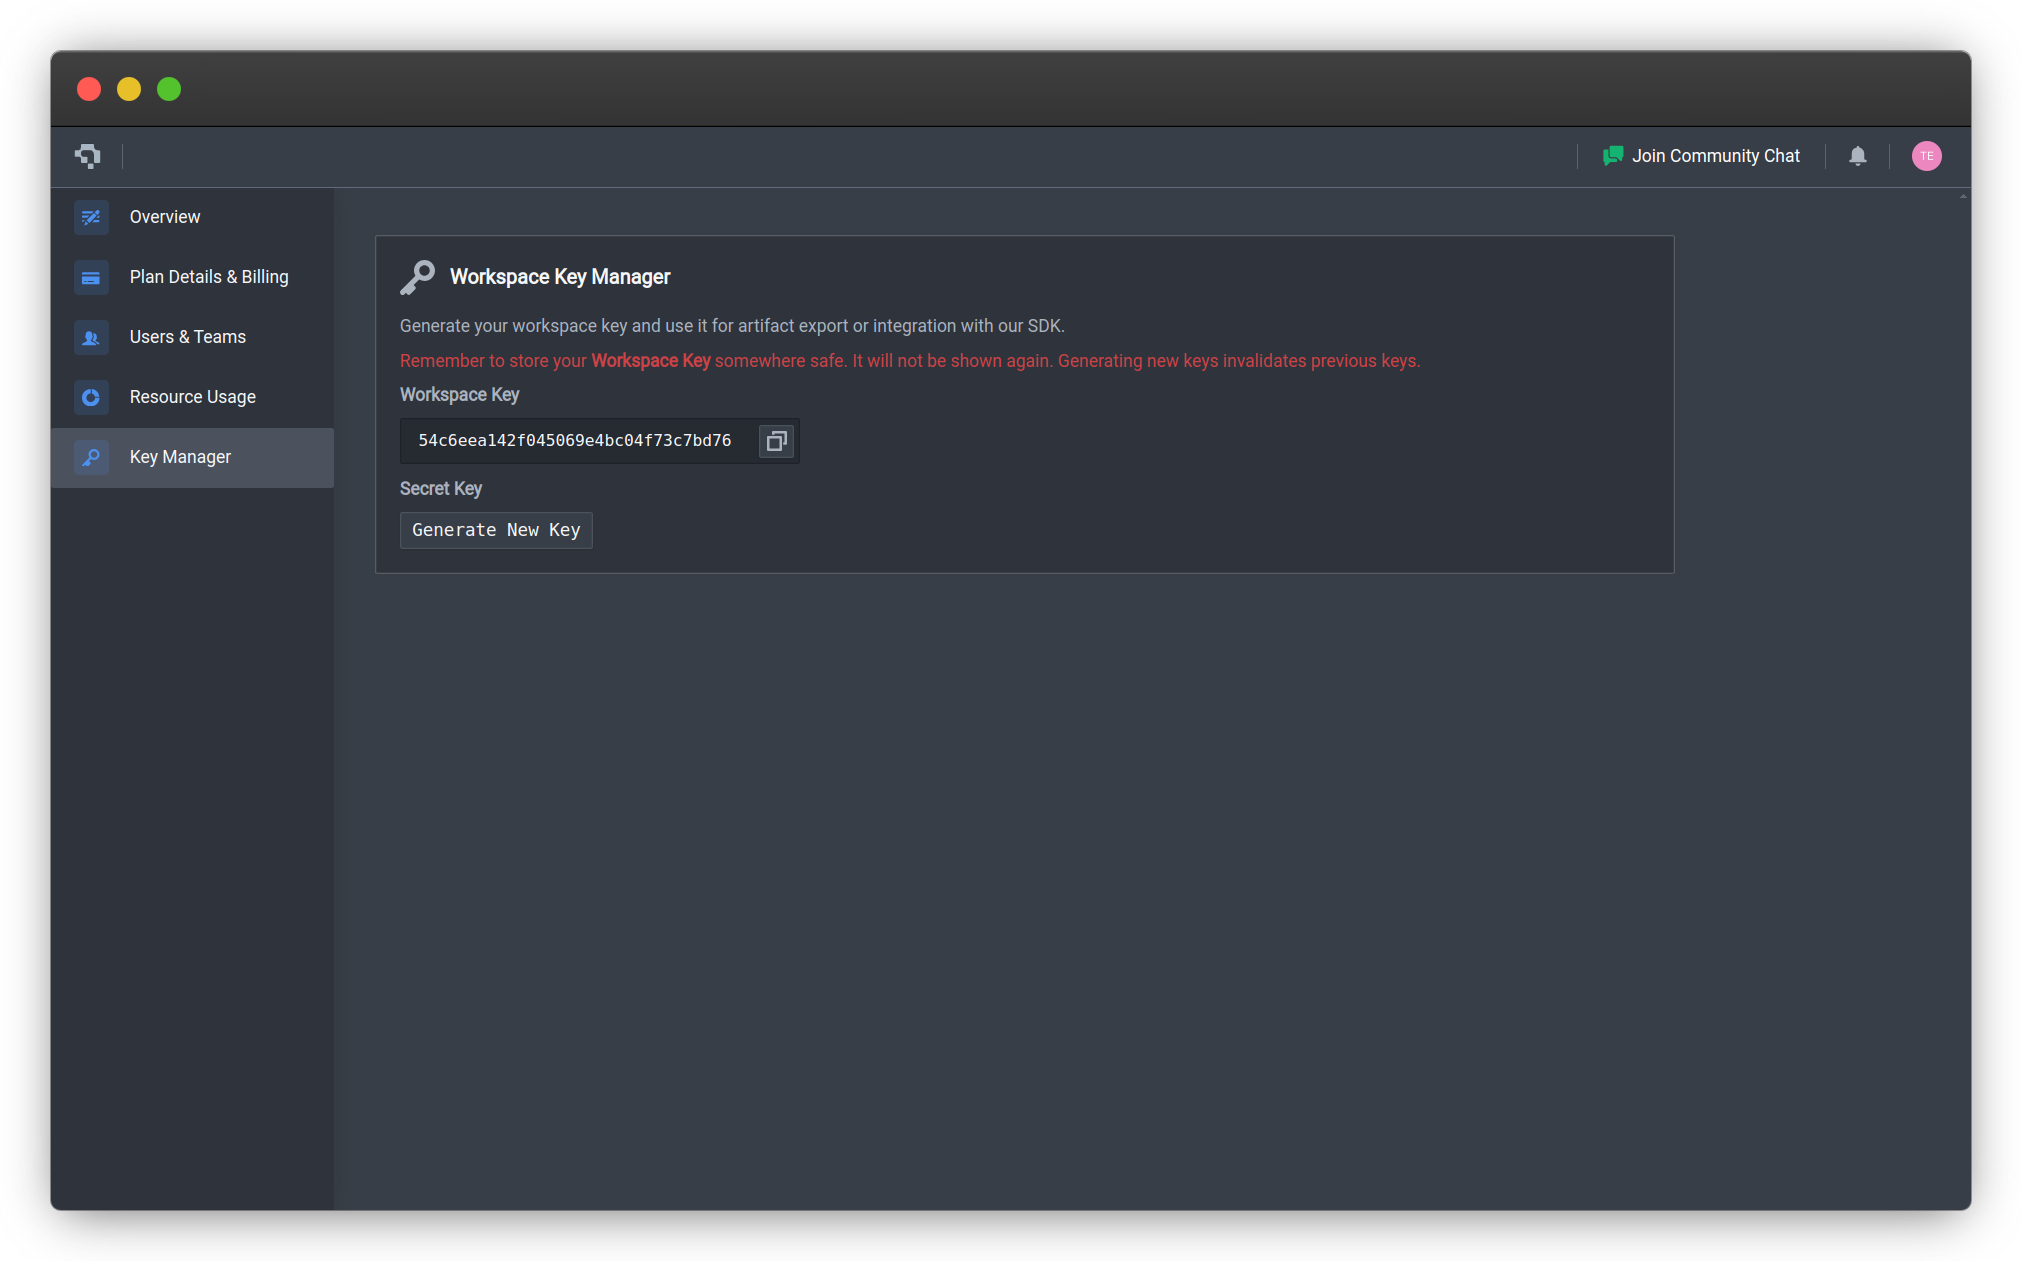
Please ensure that you retrieve the Workspace Key in the Settings page of the Workspace Dashboard, and not the Project Key that is specific to each project in your workspace.
To authenticate your Custom Runner, click on the ⚙️Settings button at the top right of your Workspace Dashboard, and navigate to the Key Manager tab. You will need to generate a Secret Key, and save both the Secret Key and Workspace ID for the runner initialization. The Secret Key will only be be shown once - you will need to regenerate this key if you navigate away from the page and have not saved it.
Install Runner
- Install Datature Python SDK and CLI:
We recommend installing the package (and subsequent packages) inside an isolated virtual environment. You can set up a virtual environment using venv, virtualenvwrapper or conda.
pip install datature - Authenticate your workspace:
This will prompt you to enter the Secret Key obtained in the Authentication step. If prompted with the selection of a project, you may choose any project.
datature projects auth - Run the following command to setup and initialize your Runner:
datature runner install - After the prerequisite packages have been verified present on your system, you will be prompted for the name of your Runner, your workspace secret key, and workspace ID. The workspace secret key and workspace ID can be obtained from the Authentication section above.
? Please enter the name for your Runner: my-custom-runner ? Please enter your Workspace Secret Key: **************************************************************** ? Please enter your workspace ID: 54c6eea142f045069e4bc04f73c7bd76 - Once the initialization has completed, you should see this message:
You can now head back to Nexus and set up a training run to check that you can select your Custom Runner.
Success: Runner installed and initialized. Return to your Nexus workspace to start a model training: https://nexus.datature.io/workspace/54c6eea142f045069e4bc04f73c7bd76 - In the case of any errors faced, check out our Error Handling guide for solutions to common issues, or contact us for support.
Manage Your Runner
To learn more about what functions you can use to manage your runner, or how to utilize your newly-set up runner to train a model on Nexus, check out the following pages:
Uninstall Runner
Runner uninstallation is irreversible. Any ongoing runs associated with the Runner will be prematurely killed. Do take note before proceeding with this action.
- Run the following command to uninstall your Runner:
You will be prompted to confirm uninstallation of your Runner.
datature runner uninstall? Are you sure you want to uninstall the Runner? This action is irreversible. Uninstalling will remove all associated data and configurations. Yes ? There are ongoing runs associated with this Runner that will be killed. Ensure to save any necessary data before proceeding. Do you wish to continue? Yes - To clean up any downloaded model images on your system, run:
microk8s ctr images rm $(microk8s ctr images ls name~='localhost:32000' | awk {'print $1'})👋 Need help? Contact us via website or email
🚀 Join our Slack Community
💻 For more resources: Blog | GitHub | Tutorial Page
🛠️ Need Technical Assistance? Connect with Datature Experts or chat with us via the chat button below 👇
Updated 6 months ago