This feature is only available for paid account tiers. Check Plans and Pricing for more information!
How to Connect S3 Buckets
Starting in your chosen project page, select the Assets tab on the sidebar and select the option Connect Amazon S3 Bucket at the top. You can then select the Begin Setup button to start the process. Also, please be logged in to your AWS account so that you have all your AWS S3 information.
In the new tab Setup Amazon S3 Integration, you should be able to see the five steps to go through in the process.
1. Bucket Details
There are four items in this section. Connection Name can be whatever you want it to be named, AWS Bucket Name is the name of your S3 bucket in AWS, which should follow AWS' naming standards such as no use of special characters. The Folder Prefix is an optional entry allowing you to choose specific subfolders in your S3 Bucket for integration. This is for you to restrict Datature's access to only the folders that you want it to read. If left empty, Nexus will just use the data in the root folder of the bucket. Ensure that the overall folder path is to a folder filled with the images that you want to be read. The last choice is the AWS Bucket Region, which is the region in which your bucket is stored, which can be checked for on the AWS website.
❗️
Possible Error Message
"There was an error in creating the bucket connection, so we cannot let you update your AWS policy as of the moment. Please try again."
If you see this message, then make sure that all your AWS bucket details are correct as well before trying again. Additionally, check that you have sufficient quota, or else you will not be able to connect your bucket!
2. AWS Policy
In this section, Datature generates two JSON files that you must copy into your AWS account in order. The first JSON is the IAM Policy. The JSON file below is an example of the JSON that will be auto-generated for you.
With this JSON, go to the AWS website under your account and go to IAM. In the IAM Dashboard, you then select IAM Policies on the sidebar, and select Create policy. Select the JSON tab and then copy and paste the auto-generated JSON, replacing whatever was in the JSON editor. In the following steps, just input a name that you can remember in the Review policy section. Filling out the other text fields are not necessary for functionality. Once you have created the policy, you should see it in the list of policies.
🚧
Any AWS-related quotas are handled by AWS so issues on that end must be handled by you.
After you have successfully created the policy, select Roles on the sidebar and select Create role. Under Trusted Entity Type, select Custom trust policy. Similarly, take the second JSON and replace all the contents in the JSON editor that should appear below. After selecting Next, select the policy that you created previously under Add permissions. Finally, provide a role name in the next page. No other text fields need to be filled for functionality. Once you have created the new role, check in the Roles page to see that your new role is there.
Before we are finally able to establish our bucket connection, we next need to navigate to your S3 bucket, select Permissions, scroll down to the CORS section and click Edit. You should then add the following JSON to the CORS policy in the editor and then save changes. If the user already has CORS policies in place, they will need to attach the JSON object into the preexisting array.
🚧
Datature Domain Changes
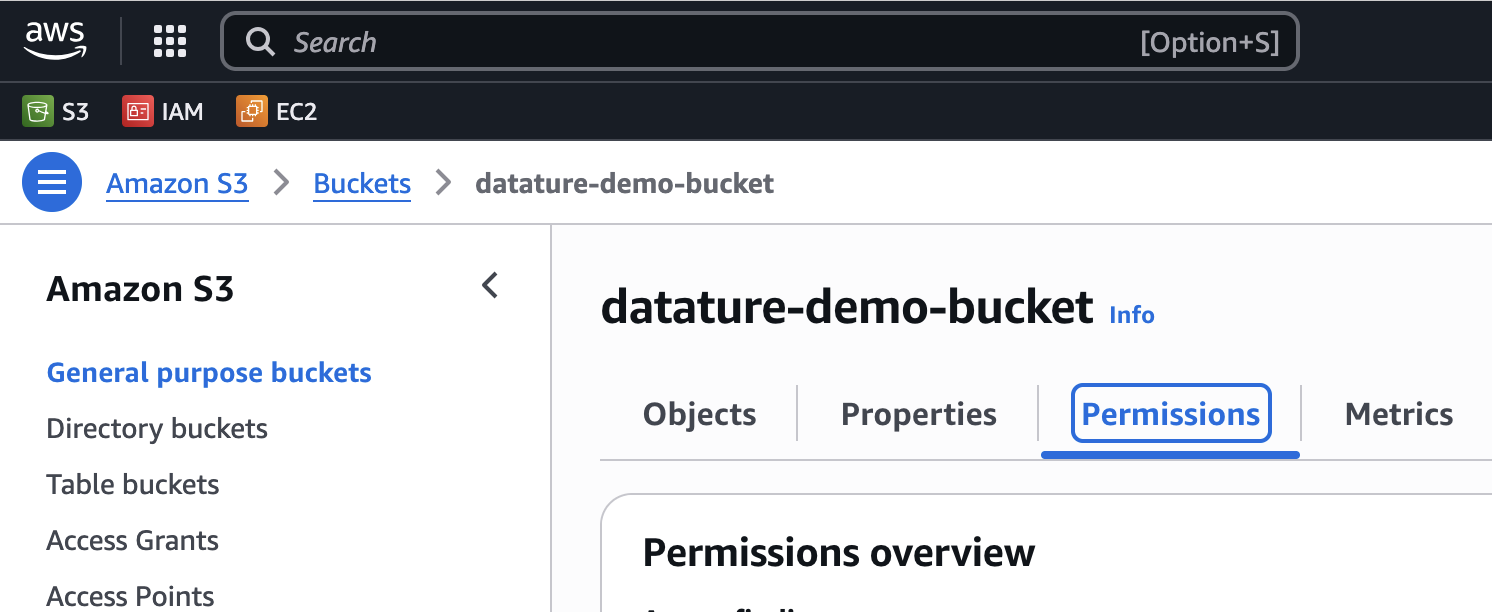
Datature is transitioning its domain from nexus.datature.io to nexus.datature.com. Please note that the JSON below has changed from its original version. To ensure you do not encounter any issues, please navigate to Permissions under your S3 bucket and replace or modify the JSON under CORS (see screenshot below)
Navigate to the Permissions menu under your S3 bucket.
For this section, you will need your AWS Role ARN. This can be found by going to the Roles page, selecting your newly made role, and copying the text under ARN with the Summary section. You can now complete the bucket connection. If it is successful, you will see a green heart with text saying that the connection was successful. If not, you will a broken heart.
🚧
Errors here do not necessarily imply that the incorrect information was entered at the third step, as this is the culminating connection step. You should check entered information in the first and second steps as well.
4. Sync Assets
Now that your S3 bucket is connected to Nexus, you can now choose whether you want to Sync Now or Sync Later. Note that you can always sync at any time after the connection has been made in Step 3. If you choose Sync Now, Nexus will begin to sync your image metadata from the bucket onto the platform.
📘
Syncs can take anywhere from 5 - 40 minutes depending on the number of assets you have in your chosen folder, so please be patient and give the platform that time to update and load all your assets so that they can be used on the rest of the platform.
Once the sync has completed, if you refresh your Assets page, you will see your assets loaded in from the bucket!
How S3 Bucket Connectivity Works and General Precautions
S3 Bucket Connectivity Functionality
We do not hold any of your actual image or video data on our platform. Rather, we are reading in the image metadata from your bucket and loading that information on our platform. Additionally, the access is read-only. Consequently, what this also means is that your S3 Bucket is essentially the master dataset. Changes to your image dataset on our platform will not be reflected in your bucket. If you have made changes in your bucket and sync on our platform, the most recent changes will be reflected.
If you have connections to multiple S3 buckets, syncing both buckets in the same Assets page will add both sets of images.
S3 Bucket Connectivity Relating to Quota Usage
Every asset that is uploaded onto our platform via S3 Bucket Connectivity still counts towards the image quota. Therefore, you should be careful to check your Usage Quota before syncing buckets so as to allow for all your assets to be uploaded and utilized on our platform. To see what account tier would be most appropriate for your image quota, go to Plans and Pricing.
Asset Requirements
Synced images must now satisfy the following new criteria because we cannot strip EXIF tags from synced assets:
The asset must have no EXIF orientation tag, or the image must have an EXIF orientation of 1 (i.e., it is already in the upright position)
Any MP4 files are supported, but with the following two restrictions:
Major brand: mp42
Pixel format: yuv420p
These restrictions ensure that the videos can play in all supported browsers in the annotator. Typical MP4 files should be able to meet these requirements.
Since we do not hold your video data on our platform, externally-synced video assets will not be modified in any way. This means that they will retain their original dimensions, quality, and audio, if any.
Common Questions
Why are my images/videos not syncing?
This issue is likely due to insufficient quota for the current month. There will be a limit on the number of images that you can upload per month, based on your current plan. For videos, the quota is calculated based on the number of frames. Your video may be rejected if the total number of frames exceed your remaining quota. Do check out your Usage Quota to monitor your monthly usage. If you would like to increase your quota, do consider upgrading your plan.