
Keypoint Skeleton
How Do I Label Keypoints?
To label keypoints, you need to first create a keypoint skeleton associated with a class label using the Skeleton Editor. In the editor, users can assign a name to the skeleton, add keypoints and connect them with edges. Any graph can be drawn with the keypoints and edges, and there is no restriction on whether keypoints must be connected at all. This keypoint skeleton will then be used as a template for annotating keypoint instances.
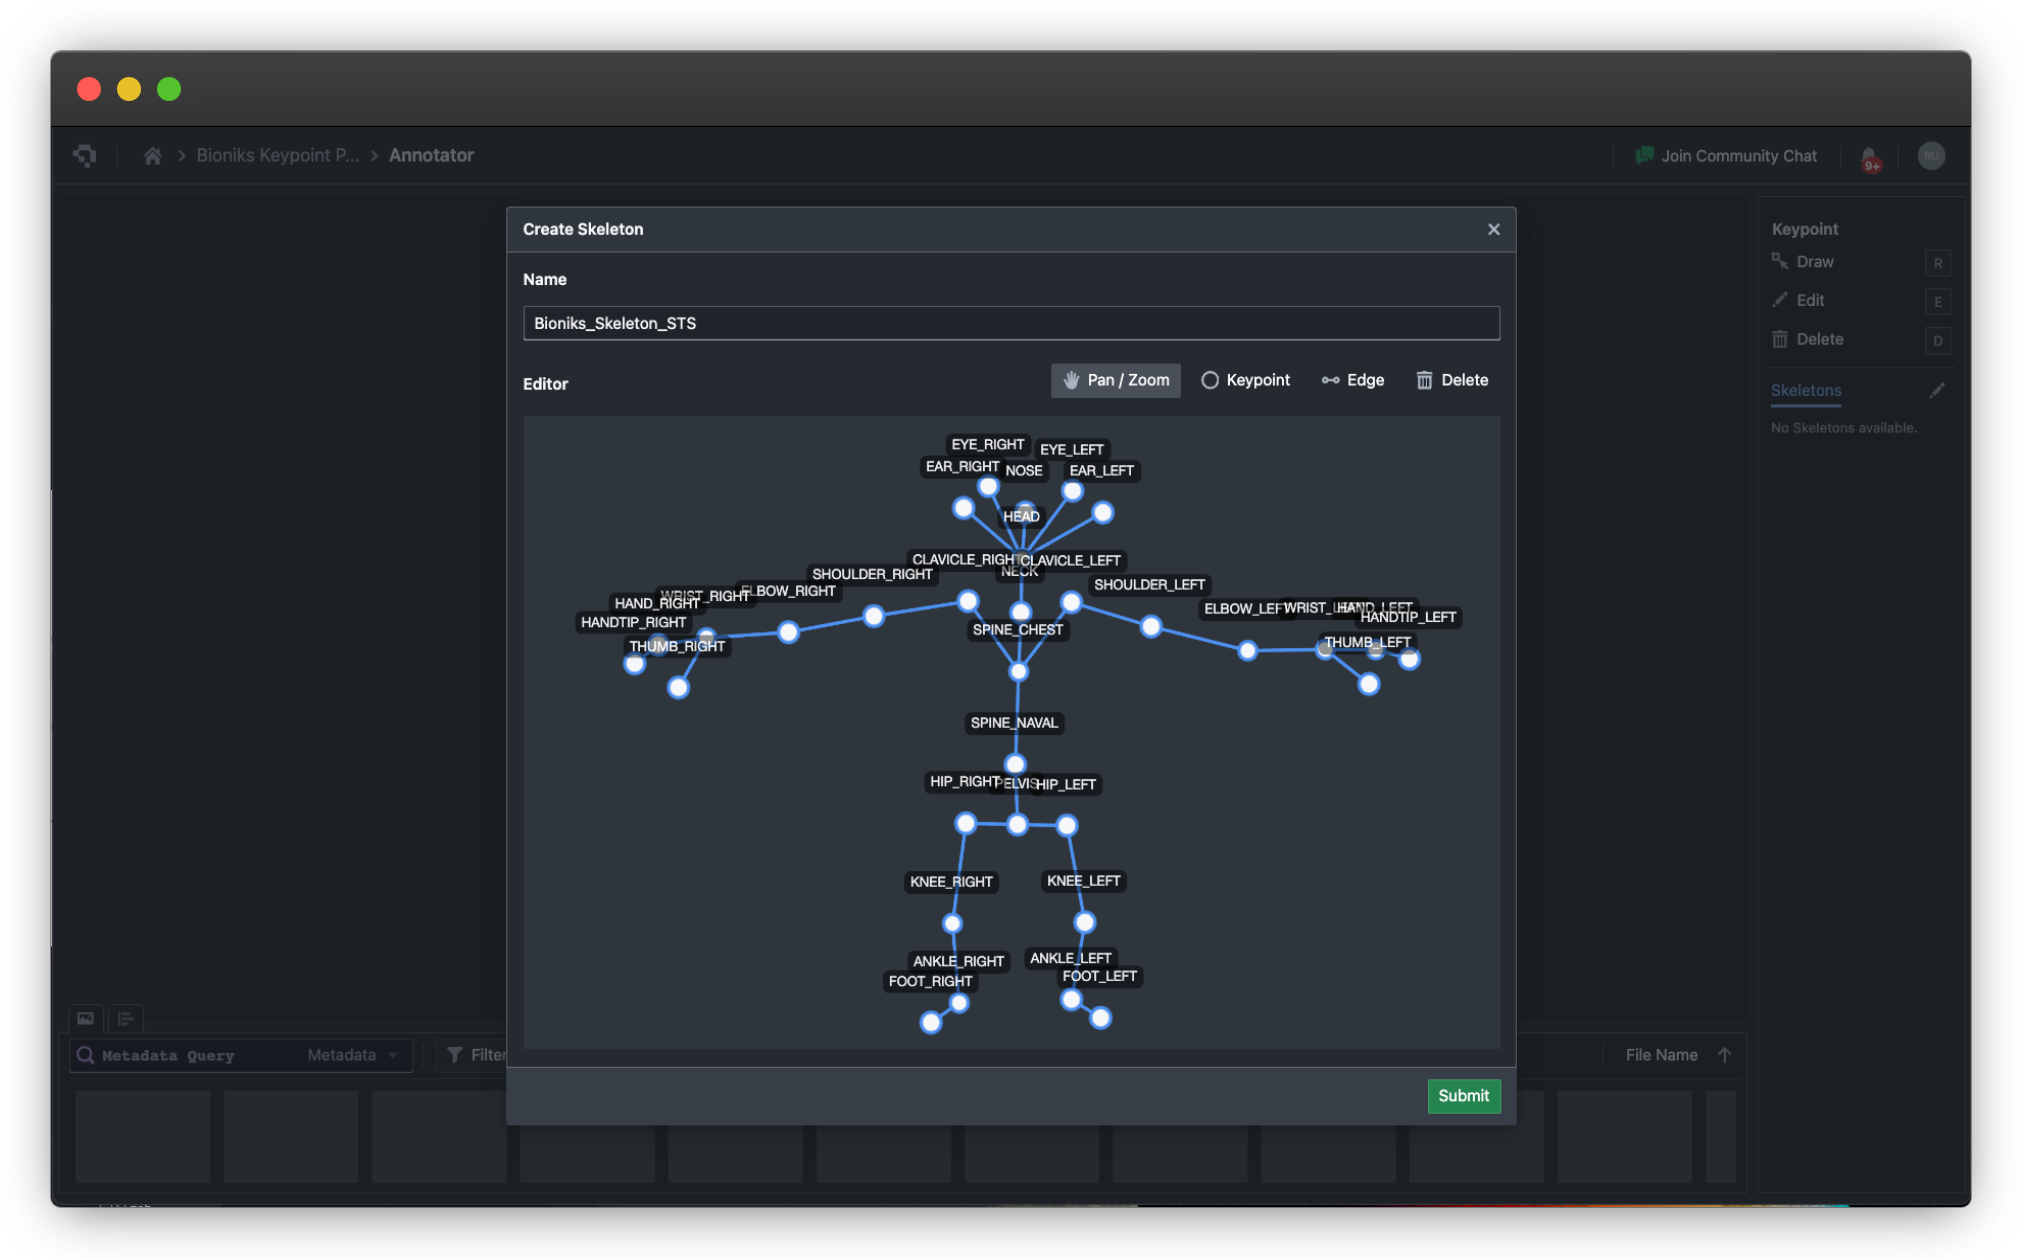
Example skeleton created in the Skeleton Editor (click to enlarge)
Once the skeleton has been created, you can select the skeleton class using the tag list on the right sidebar of the Annotator. To label objects in your image, simply click on Draw (hotkey R), where you can click and drag to define a bounding box around an object. The keypoint skeleton will be overlaid within this box, after which the points on the skeleton can be adjusted to the correct areas of the image, as shown below.
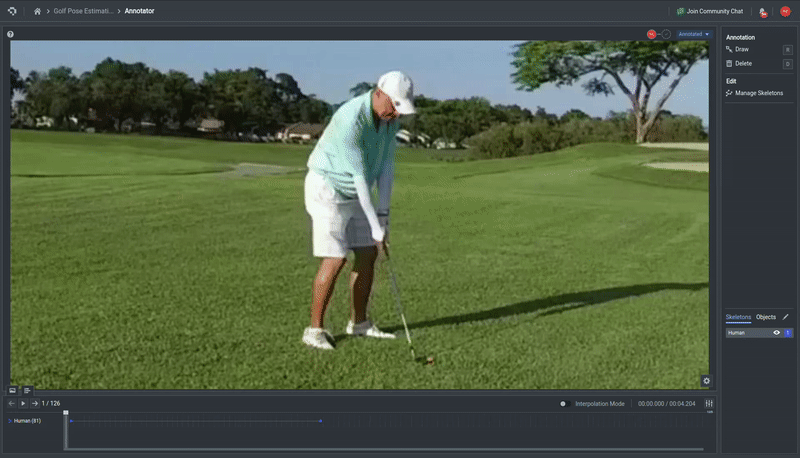
Keypoint skeleton annotation on an image (click to enlarge)
To delete a keypoint annotation, simply click on Delete (hotkey D), and then click on the annotation you wish to delete.
👋 Need help? Contact us via website or email
🚀 Join our Slack Community
💻 For more resources: Blog | GitHub | Tutorial Page
🛠️ Need Technical Assistance? Connect with Datature Experts or chat with us via the chat button below 👇
Updated 10 months ago