
Datature Pipeline
An overview of the Datature pipeline - from creating a project to deploying your trained model 🚀
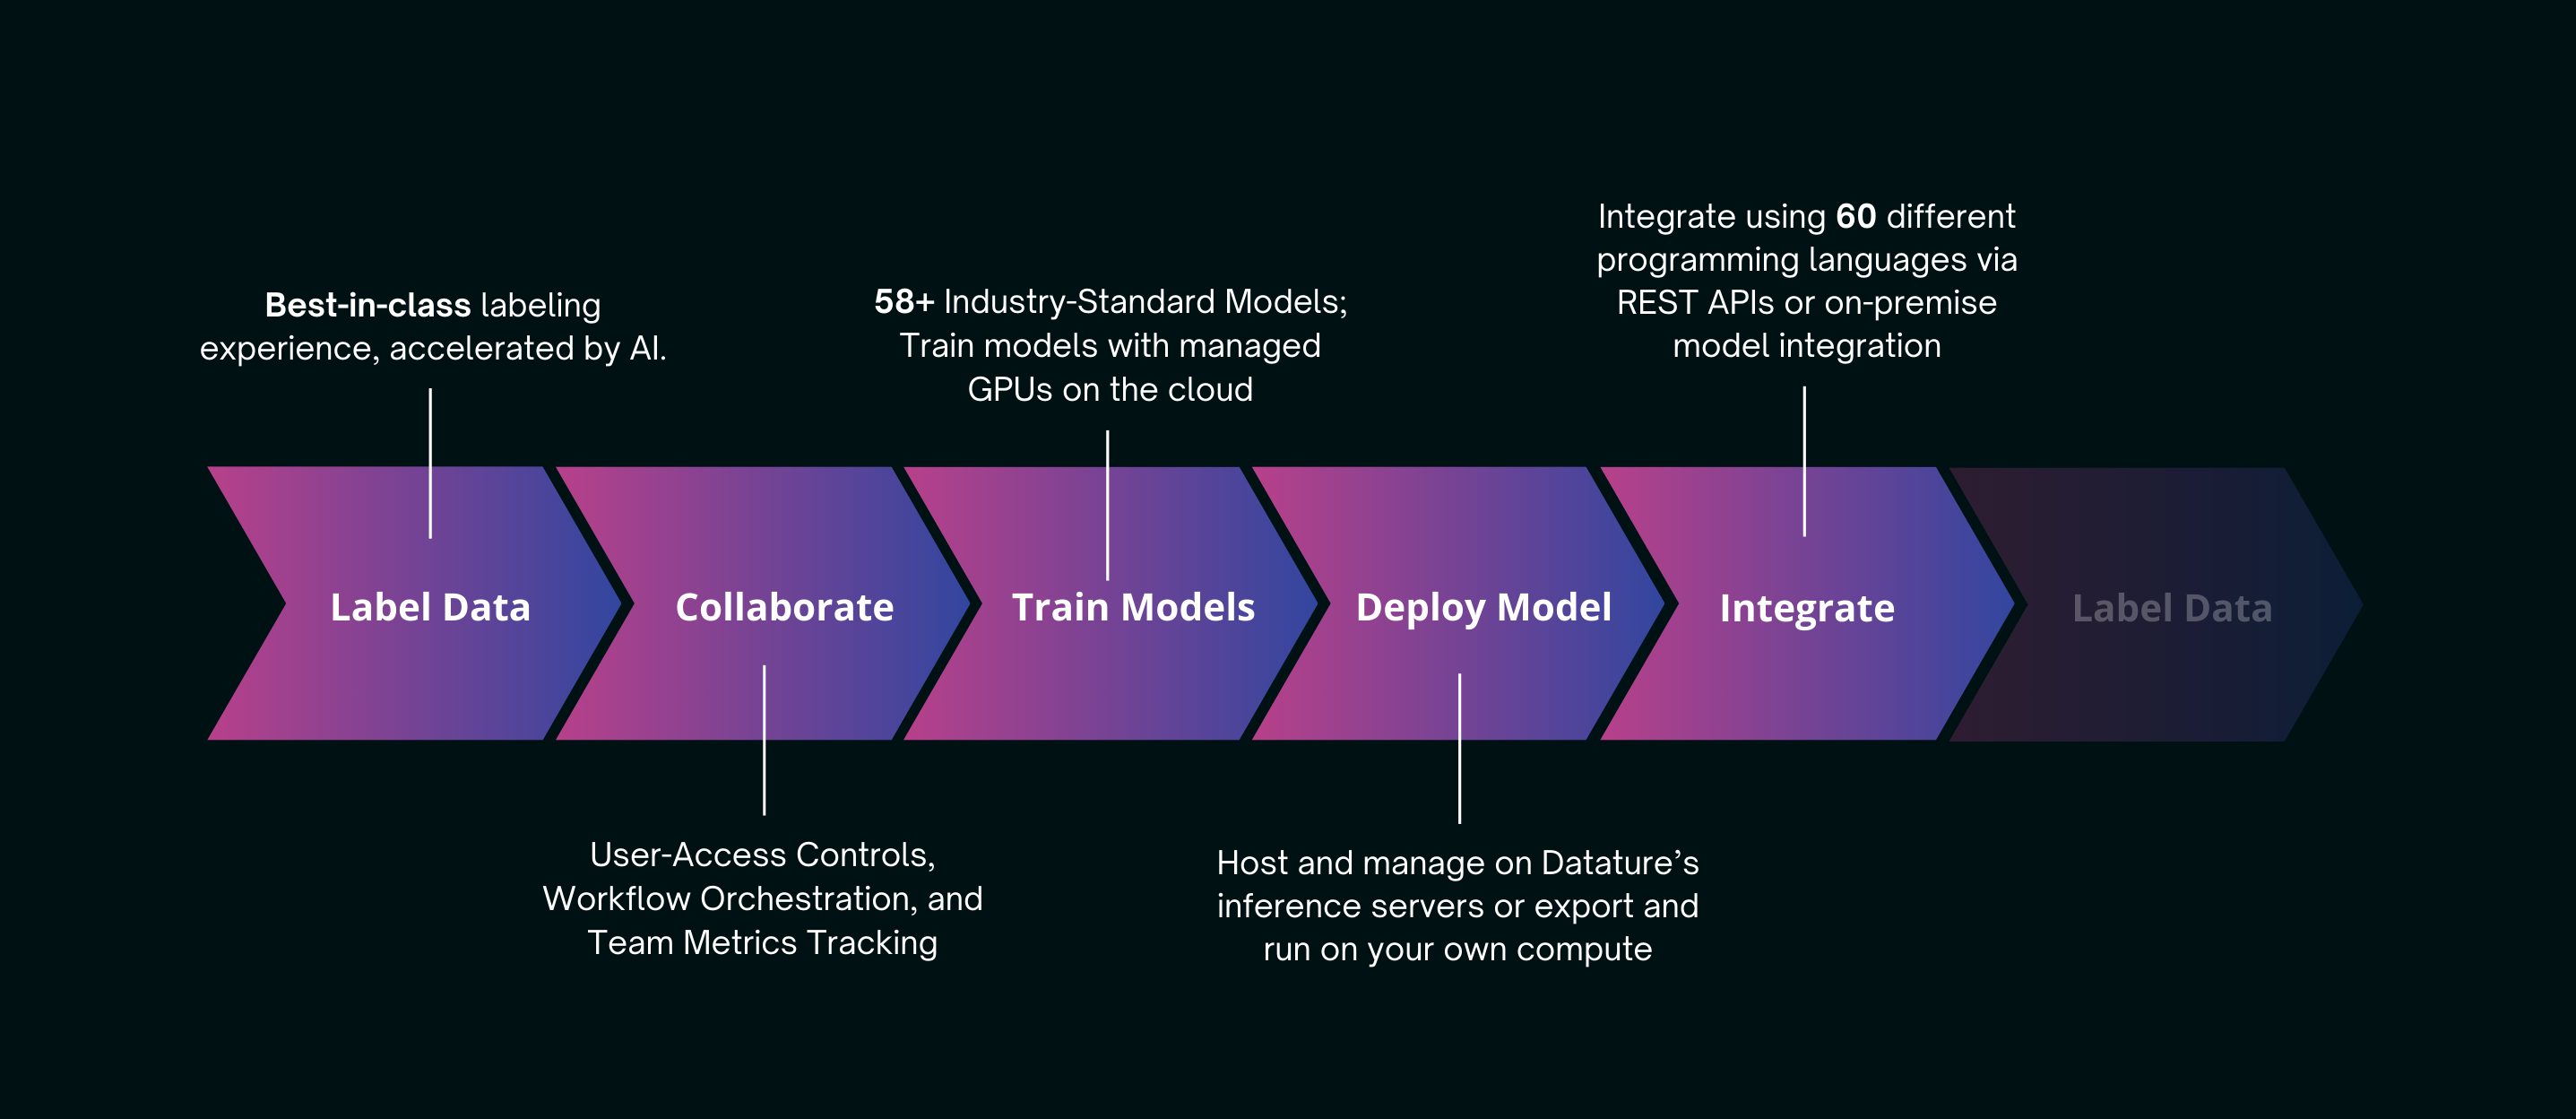
Datature empowers you to build and deploy computer vision solutions without writing a single line of code. Our intuitive drag-and-drop interface lets you create models that would typically require hundreds of lines of complex machine learning code.
The Pipeline
Get Started in Minutes
-
Create a Project
Start by creating a project. You can easily modify your project later. For collaboration, refer to Managing Project Collaborators to add or remove team members. -
Onboard Your Data and Labels
Next, onboard data and labels. If you don't have everything ready, you can upload data later using Uploading Data and Uploading Annotations. You can also download your images and export annotations whenever needed. -
Annotate Your Data
Data annotation can be tedious. If you need to add annotations, Creating Annotations is straightforward. Explore our extensive Annotation Tools for various options. The IntelliBrush tool allows for quick and high-quality annotations. -
Examine Your Annotated Dataset
Analyze your annotated dataset to ensure it meets your needs. To filter data based on specific criteria, refer to Managing Tags. -
Create Your Training Workflow
Once satisfied with your dataset, begin Creating Training Workflow. A standard workflow includes at least a Dataset module and a Model module; an Augmentations module is optional but recommended. Check out the details for Dataset Module , Augmentations Module , and Model Module. If overwhelmed by choices, use the Auto-Suggest Workflow feature for guidance. -
Preview Your Augmentations
If you added an augmentation module, preview it by clicking the Preview Augmentations button before training begins. -
Run the Workflow
Start training by clicking the green Run Training button on the workflow page. Default settings for Hardware Acceleration, Checkpoint Strategy, and Advanced Evaluation are provided, but you can customize them through Hardware Options. -
Monitor Your Training
After starting training, monitor the process on the trainings page by checking statuses and error alerts through Monitoring Training Process. -
Evaluate Model Performance
After training, assess your model's performance by following the steps in Evaluating Model Performance. If you're not satisfied, explore options forImproving Model Performance. -
Test and Use Your Trained Model
Once you're happy with your model, test predictions using our no-code application Portal, access it via our API, or download it for custom deployments. For further steps after training, visit Managing Trained Models.
Updated 11 months ago