
Model Assisted Labelling
Video Recap
- Start anAPI Deployment - Ensure that you can see the deployment online on the Deployment tab on your project page before continuing with next steps.
- Select your preferred deployment for use through Model Settings - Currently online deployments will be displayed when you hover over the Model Settings and select the Select a Deployment dropdown menu which can be found in the Intelligent Tools tab.
- Select Model Assist - The Model Assist annotation option can be found under the Intelligent Tools tab or you can use the hot-key
M. - Select preferred bounding boxes from the greyed out suggestions - You can now commit annotations based on suggested annotations that appear. You can select any number of proposed annotations that appear on the annotator for commits. Decisions for commits and the displayed suggestions can be controlled with the Assist Settings.
- Select Commit or Commit All - Congratulations, your model assisted annotations have been created! You can now edit and alter them like any other annotation made on the annotator or move on to the next image.
Model assisted labelling utilizes inference API calls to create predictions, so usages should be tracked on the deployment page!
Assist Settings
The top part of the settings is a confidence threshold slider bar. This will threshold the corresponding proposed annotations that appear on the screen. The higher the threshold is set, the less suggested annotations will appear. This can be used to filter for annotations that the model is more confident in and thus more likely to be an accurate annotation.
The other two buttons at the bottom deal with how the user wants to commit annotations to the annotator. The first button, Space, commits manually selected annotations by the user out of the greyed out suggested annotations. The selected annotations, upon selection, will show up in their corresponding tag colors. After selecting to commit, they will appear as regular annotations.
The second button , S, will commit all suggested annotations appearing on the annotator. This can be a faster way to annotate images fully if the model is well trained and has demonstrated strong performance in proposing accurate images. In this way, one can simply flip through images, select the Model Assist option and commit all annotations, thus annotating an entire image in two clicks.
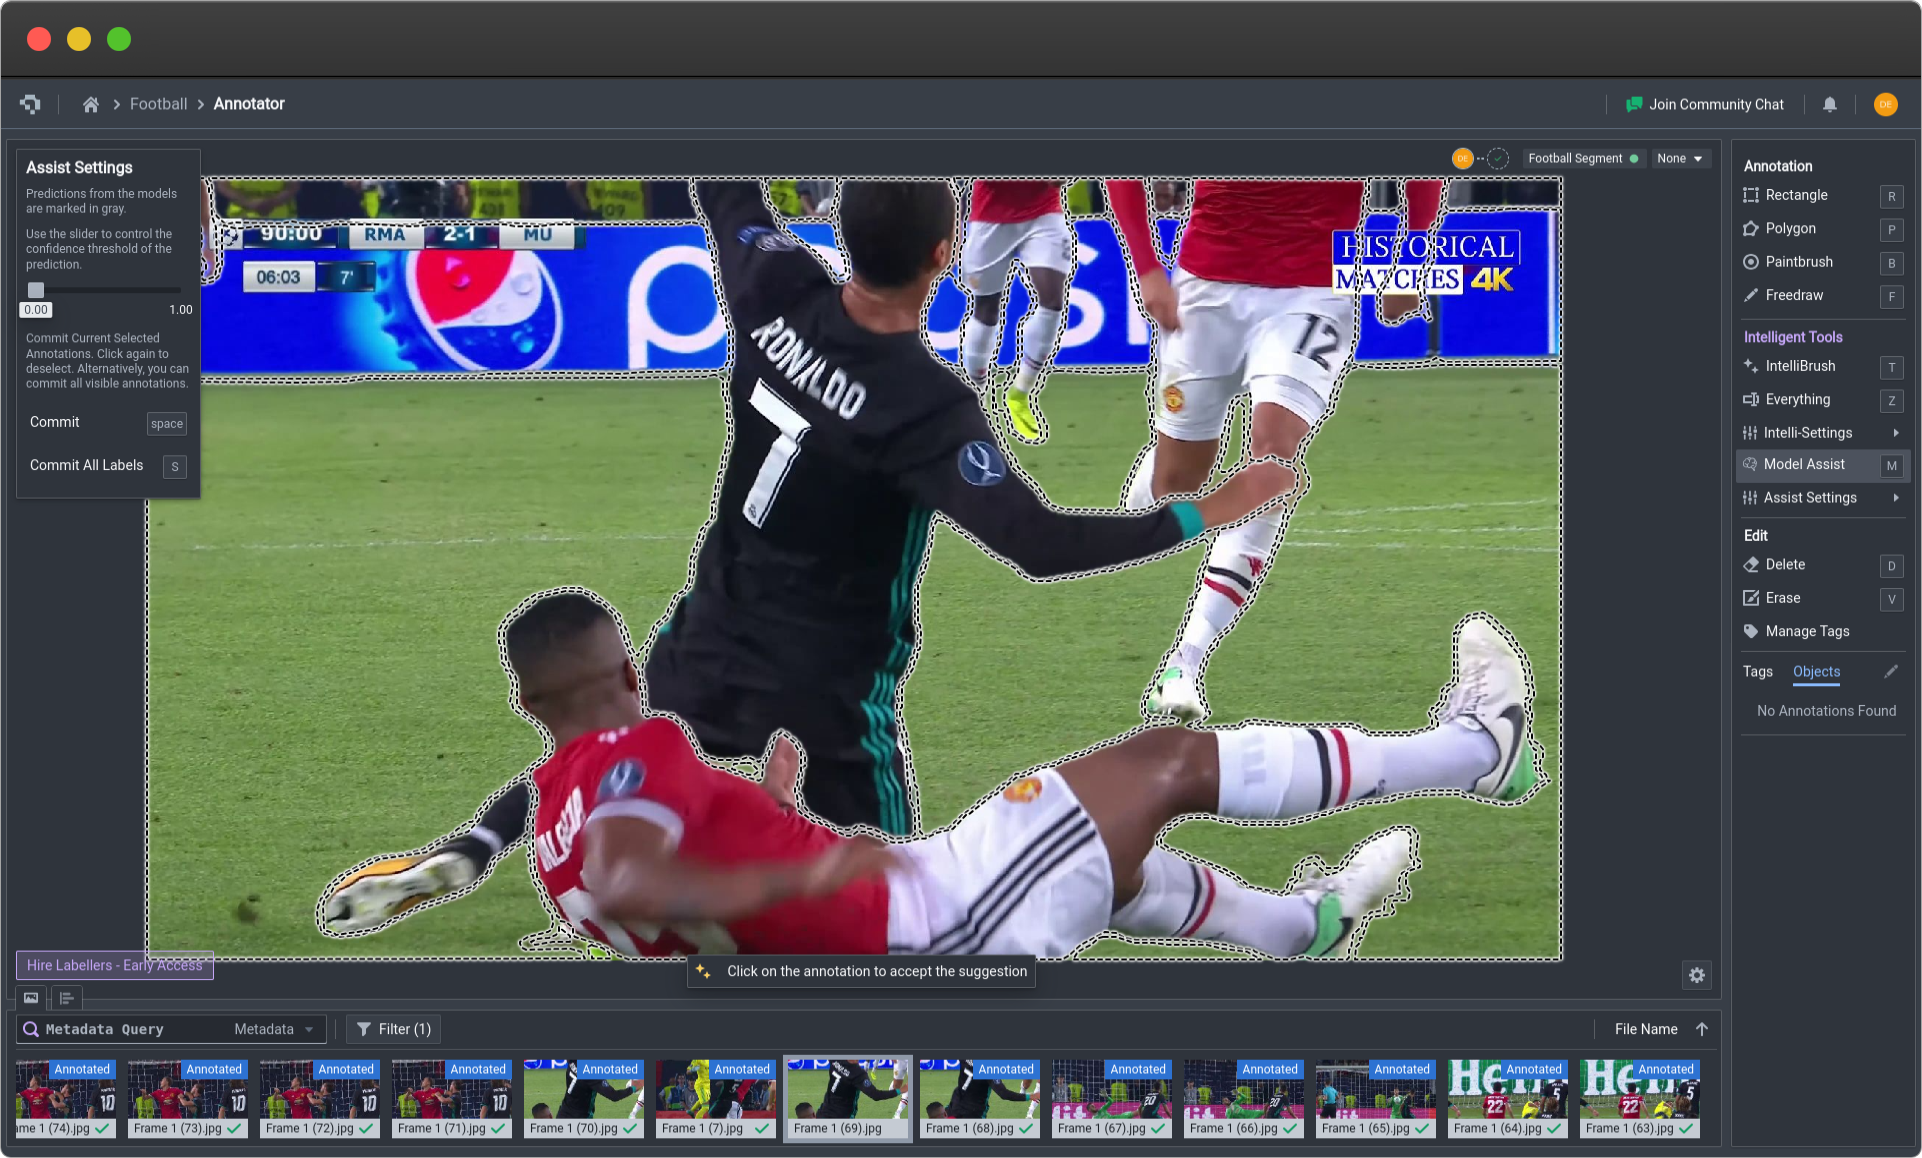
Model Assist and Assist Settings for Image Segmentation (click image to enlarge)
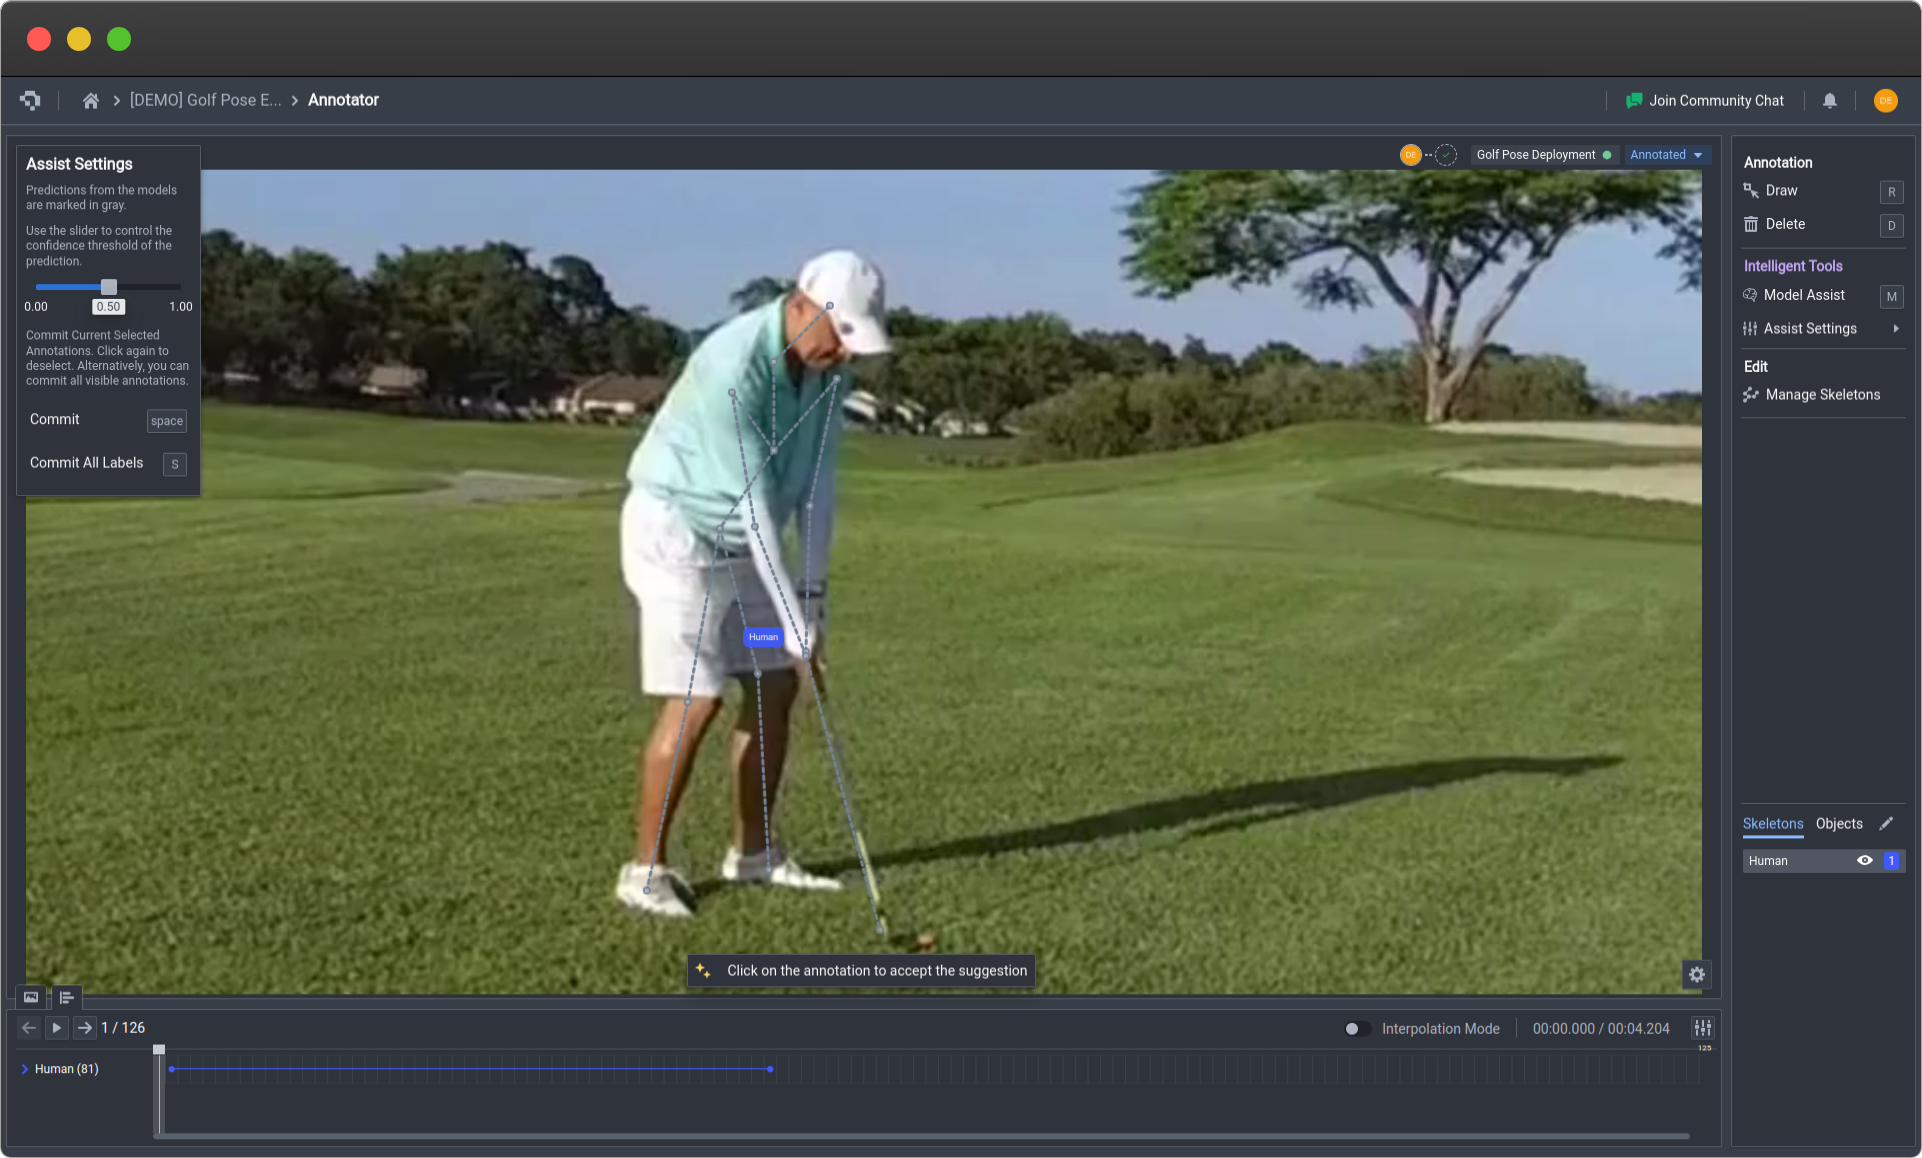
Model Assist and Assist Settings for Keypoint Detection (click image to enlarge)
Common Questions
How does Model Assisted Labelling work?
Model Assisted Labelling harnesses the power of our Inference API which utilizes your previously trained model artifacts to perform predictions on images currently being viewed on the annotator. Therefore, in order to be able to make use of model assisted labelling, one must have an online deployment.
Will Model Assisted Labelling affect the latency of my online deployment?
Model Assisted Labelling utilizes the Inference API just like any other type of API request. Therefore, in most instances, model assisted labelling is unlikely to cause major issues given that a request on the labelling side is not likely to be made more than once a second.
How does Model Assisted Labelling contribute to the MLOps pipeline?
Model Assisted Labelling helps to utilize the trained model artifacts to accelerate the annotation process, and enabling a more rapid cycle from data acquisition, data annotation, to model retraining. As the models improve, the annotation speed should improve, thus creating a more streamlined and iterable MLOps pipeline.
👋 Need help? Contact us via website or email
🚀 Join our Slack Community
💻 For more resources: Blog | GitHub | Tutorial Page
🛠️ Need Technical Assistance? Connect with Datature Experts or chat with us via the chat button below 👇
Updated 10 months ago