
Annotation Types
Annotation Types for Different Computer Vision Tasks
Different computer vision tasks require a certain type of annotation or minimal level of annotation detail to properly train the corresponding models sufficiently. Datature currently supports the following computer vision tasks:
| Task | Description | Output |
|---|---|---|
| Classification | Classifies images with tags. | Outputs class tags. |
| Object Detection | Identifies objects in an image with bounding boxes and class tags. | Outputs bounding box coordinates and a class tag for each detected instance. |
| Semantic Segmentation | Used to describe which regions of pixels correspond to specific classes. | Outputs a mask array where each pixel has a value that is associated to a class. |
| Instance Segmentation | Used to describe which regions of pixels correspond to individual class instances. | Outputs a list of polygons with their associated class. |
The corresponding annotations required to train these tasks follow this compatibility matrix:
| Annotation Types | Classification | Object Detection | Semantic Segmentation | Instance Segmentation | Keypoint Detection |
|---|---|---|---|---|---|
| Class Tag | ✅ | ❌ | ❌ | ❌ | ❌ |
| Bounding Box | ❌ | ✅ | ❌ | ❌ | ❌ |
| Polygon | ❌ | ✅ | ✅ | ✅ | ❌ |
| Keypoint | ❌ | ❌ | ❌ | ❌ | ✅ |
| Bitmask | ❌ | ❌ | ✅ | ✅ | ❌ |
Class Tag
To annotate with classification, ensure that during project creation, you specify the type of project as Classification or Multiclass Classification. With this setup, when you upload images and enter the annotator, this will be annotation setup you see. There are three functions:
| Annotation Action | Description | Hotkey |
|---|---|---|
| Assign | Assigns the selected tag to the image. One can change tags by going to the tag list on the right sidebar and selecting the preferred tag, or using the hotkey assigned to the class. | A |
| Background | Assign the background class. | B |
| Delete | Delete the class that's been assigned to the image. | D |
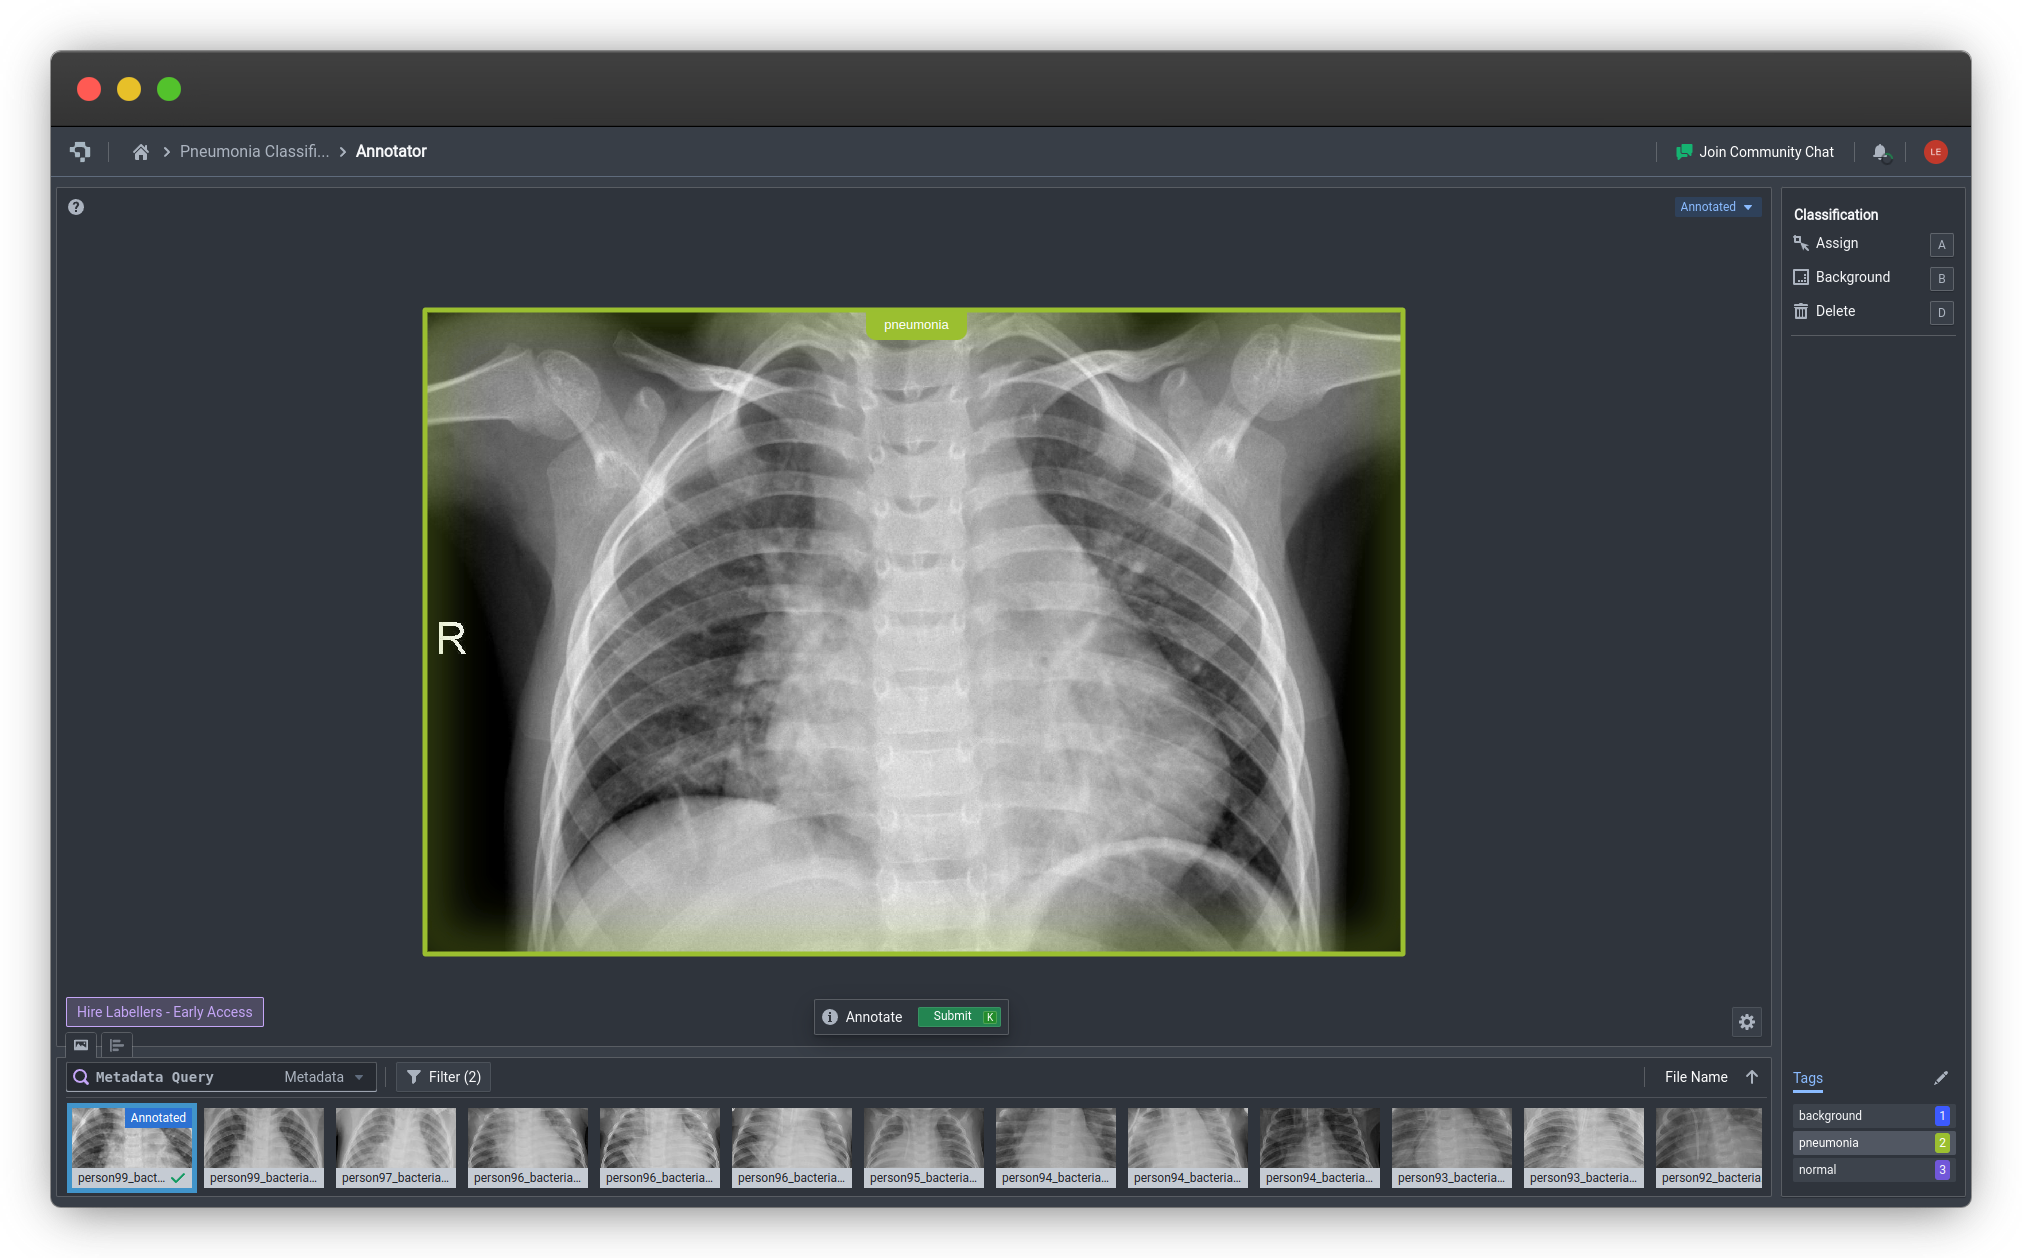
Example of classification annotation (click to enlarge)
Multilabel Classification
With multilabel classification, you still select a tag and assign it, but you can now assign multiple tags to the same image. They will appear something like the following image.
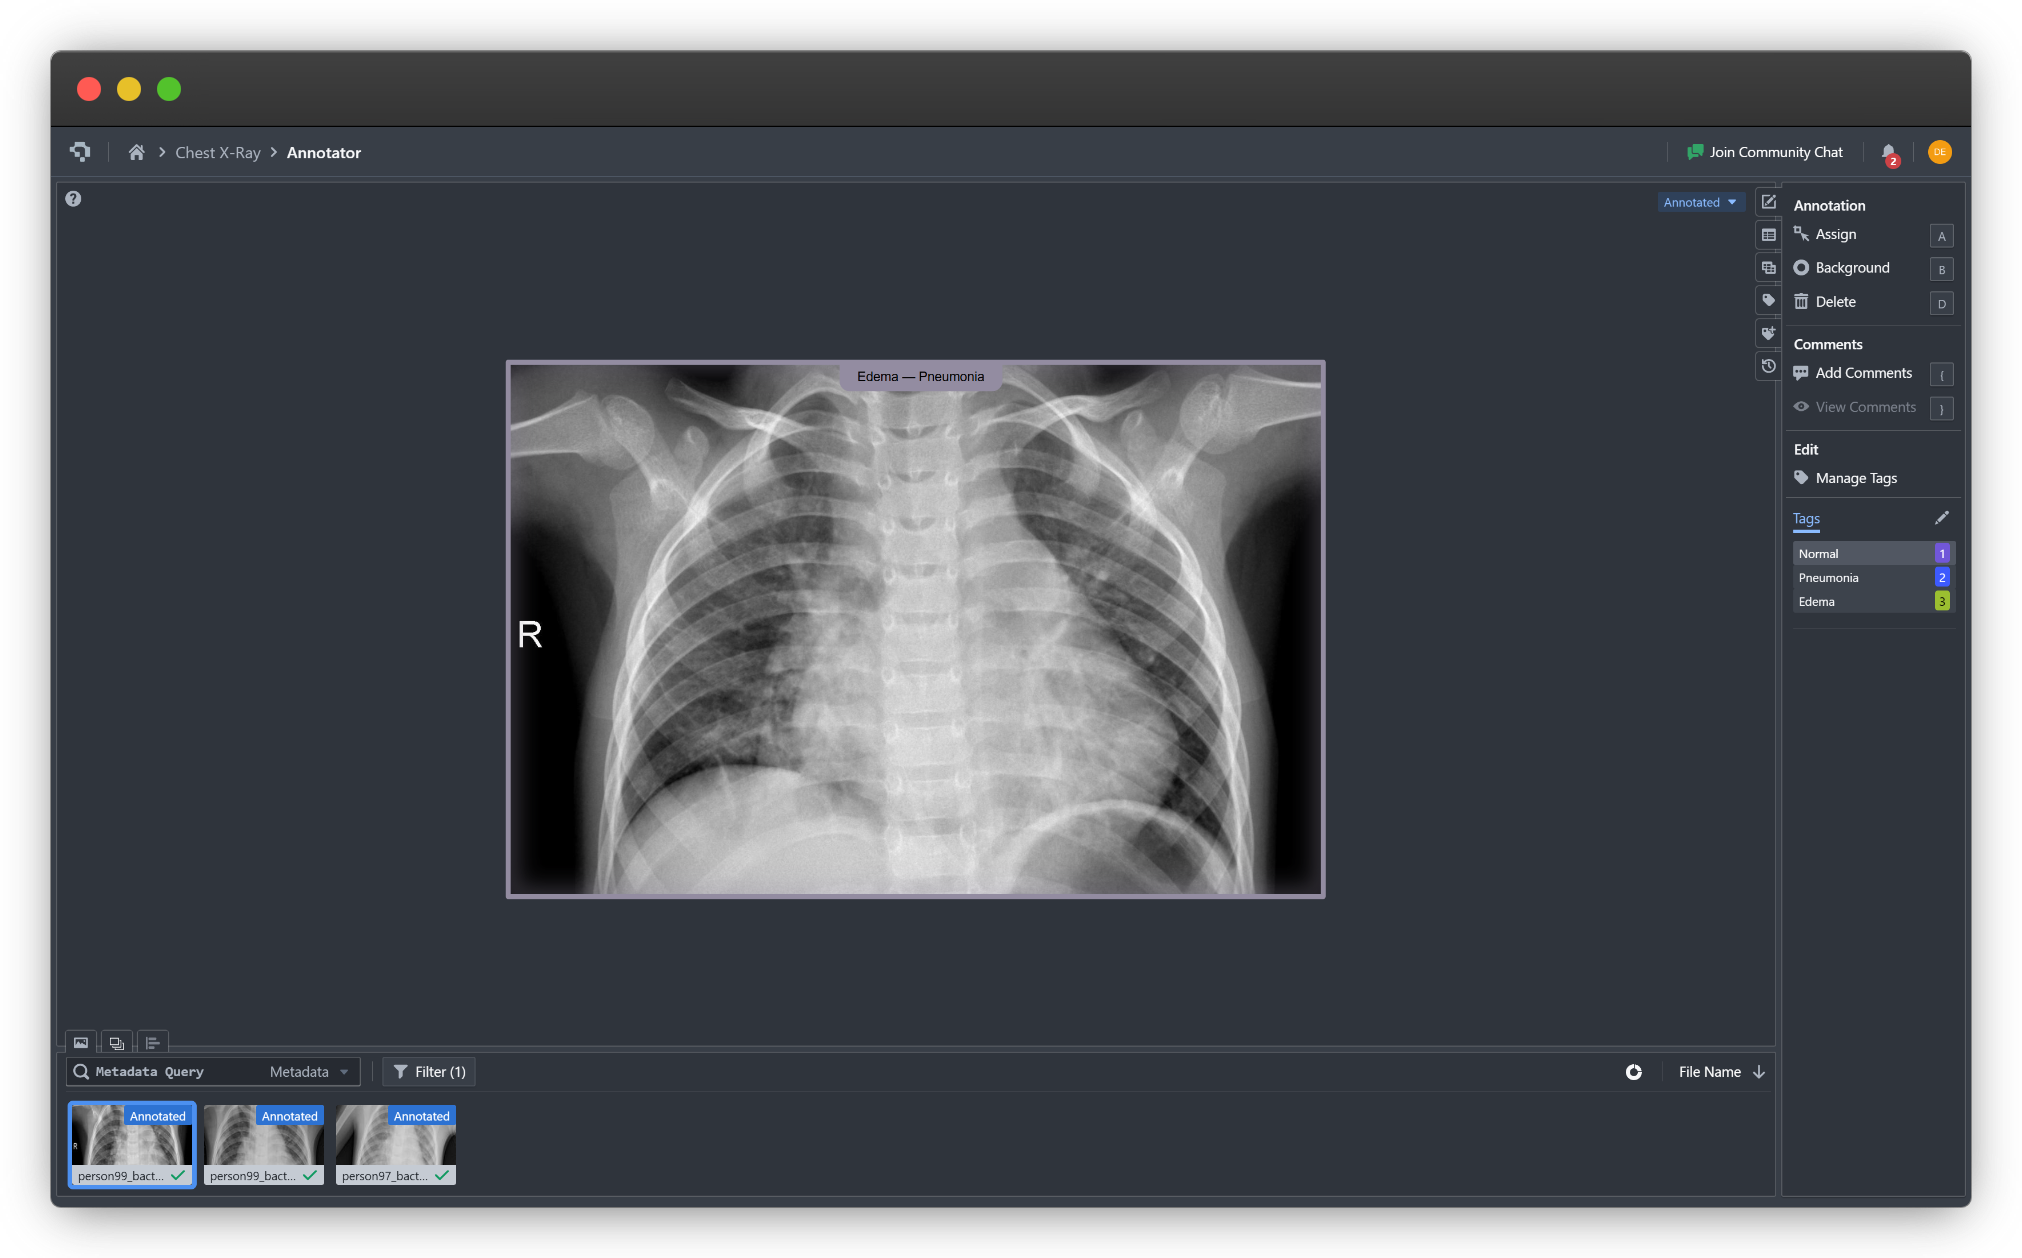
Example of multiclass classification (click to enlarge)
Bounding Box
To annotate bounding boxes, you can easily do this with the Bounding Box tool. You can subsequently click and drag to create boxes. You can also use Box Mode with IntelliBrush, which will automatically produce bounding boxes around the object based on user positive and negative clicks. These bounding boxes are subsequently suitable for only object detection models.
They are not suitable for classification models because our classification models do not support multi-label classification, and bounding boxes can have different classifications within the same image, so there's no lossless way to train a classification model on these.
Bounding boxes are additionally not sufficiently detailed to train good instance segmentation models that can accurately outline objects. As such, it is not advisable to train segmentation models with bounding box data.
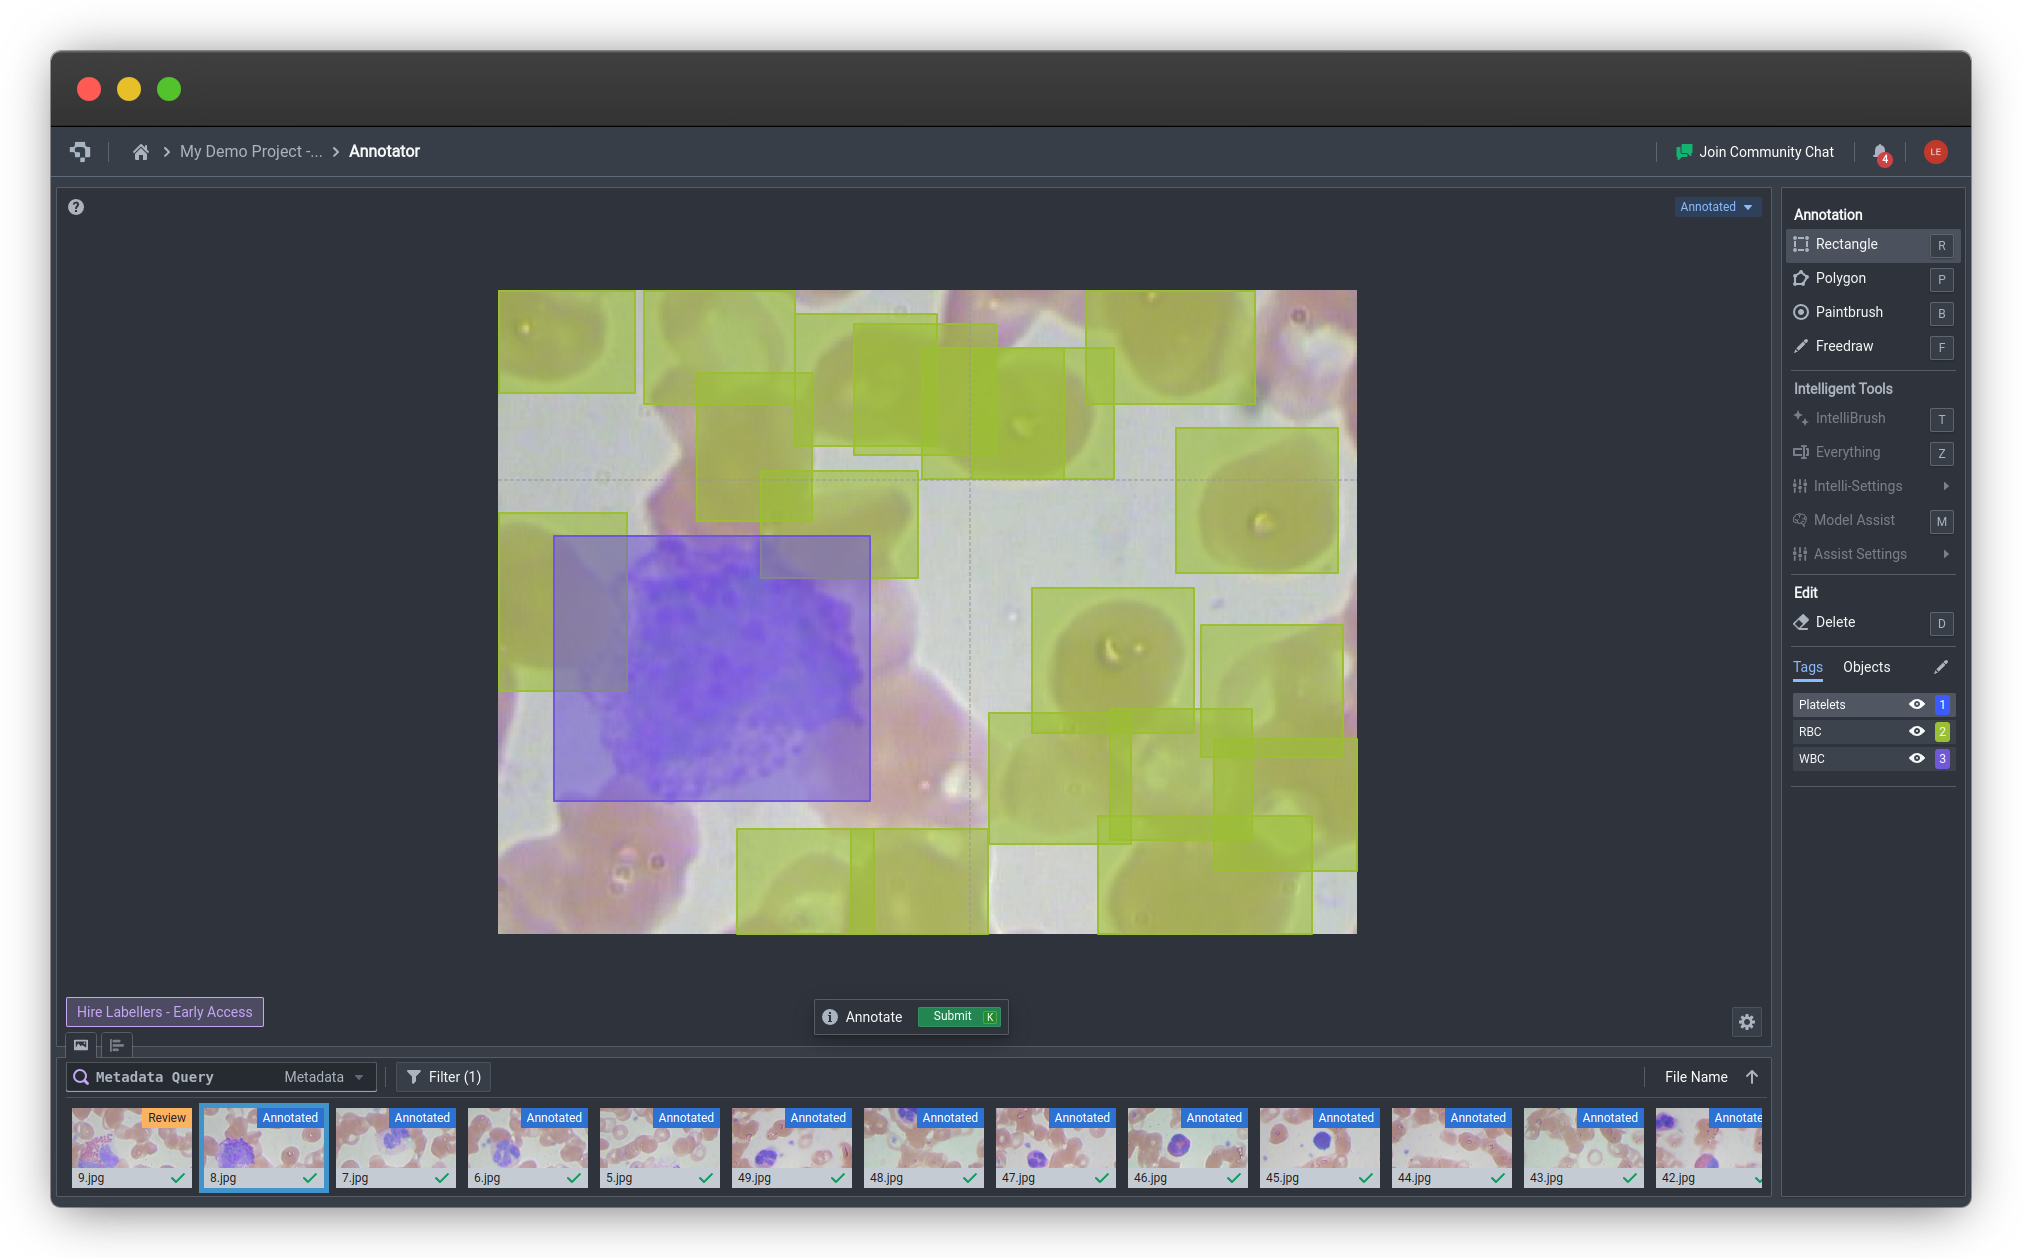
Example of bounding box annotations on the Nexus Annotator (click to enlarge)
Polygon
You can annotate polygons with Paintbrush, Polygonal, Freedraw, and IntelliBrush. These annotations are specifically designed for semantic segmentation or instance segmentation tasks.
They can still be used for other tasks such as object detection automatically, as the minimum bounding box of the polygon will be used as the bounding box for object detection model trainings.
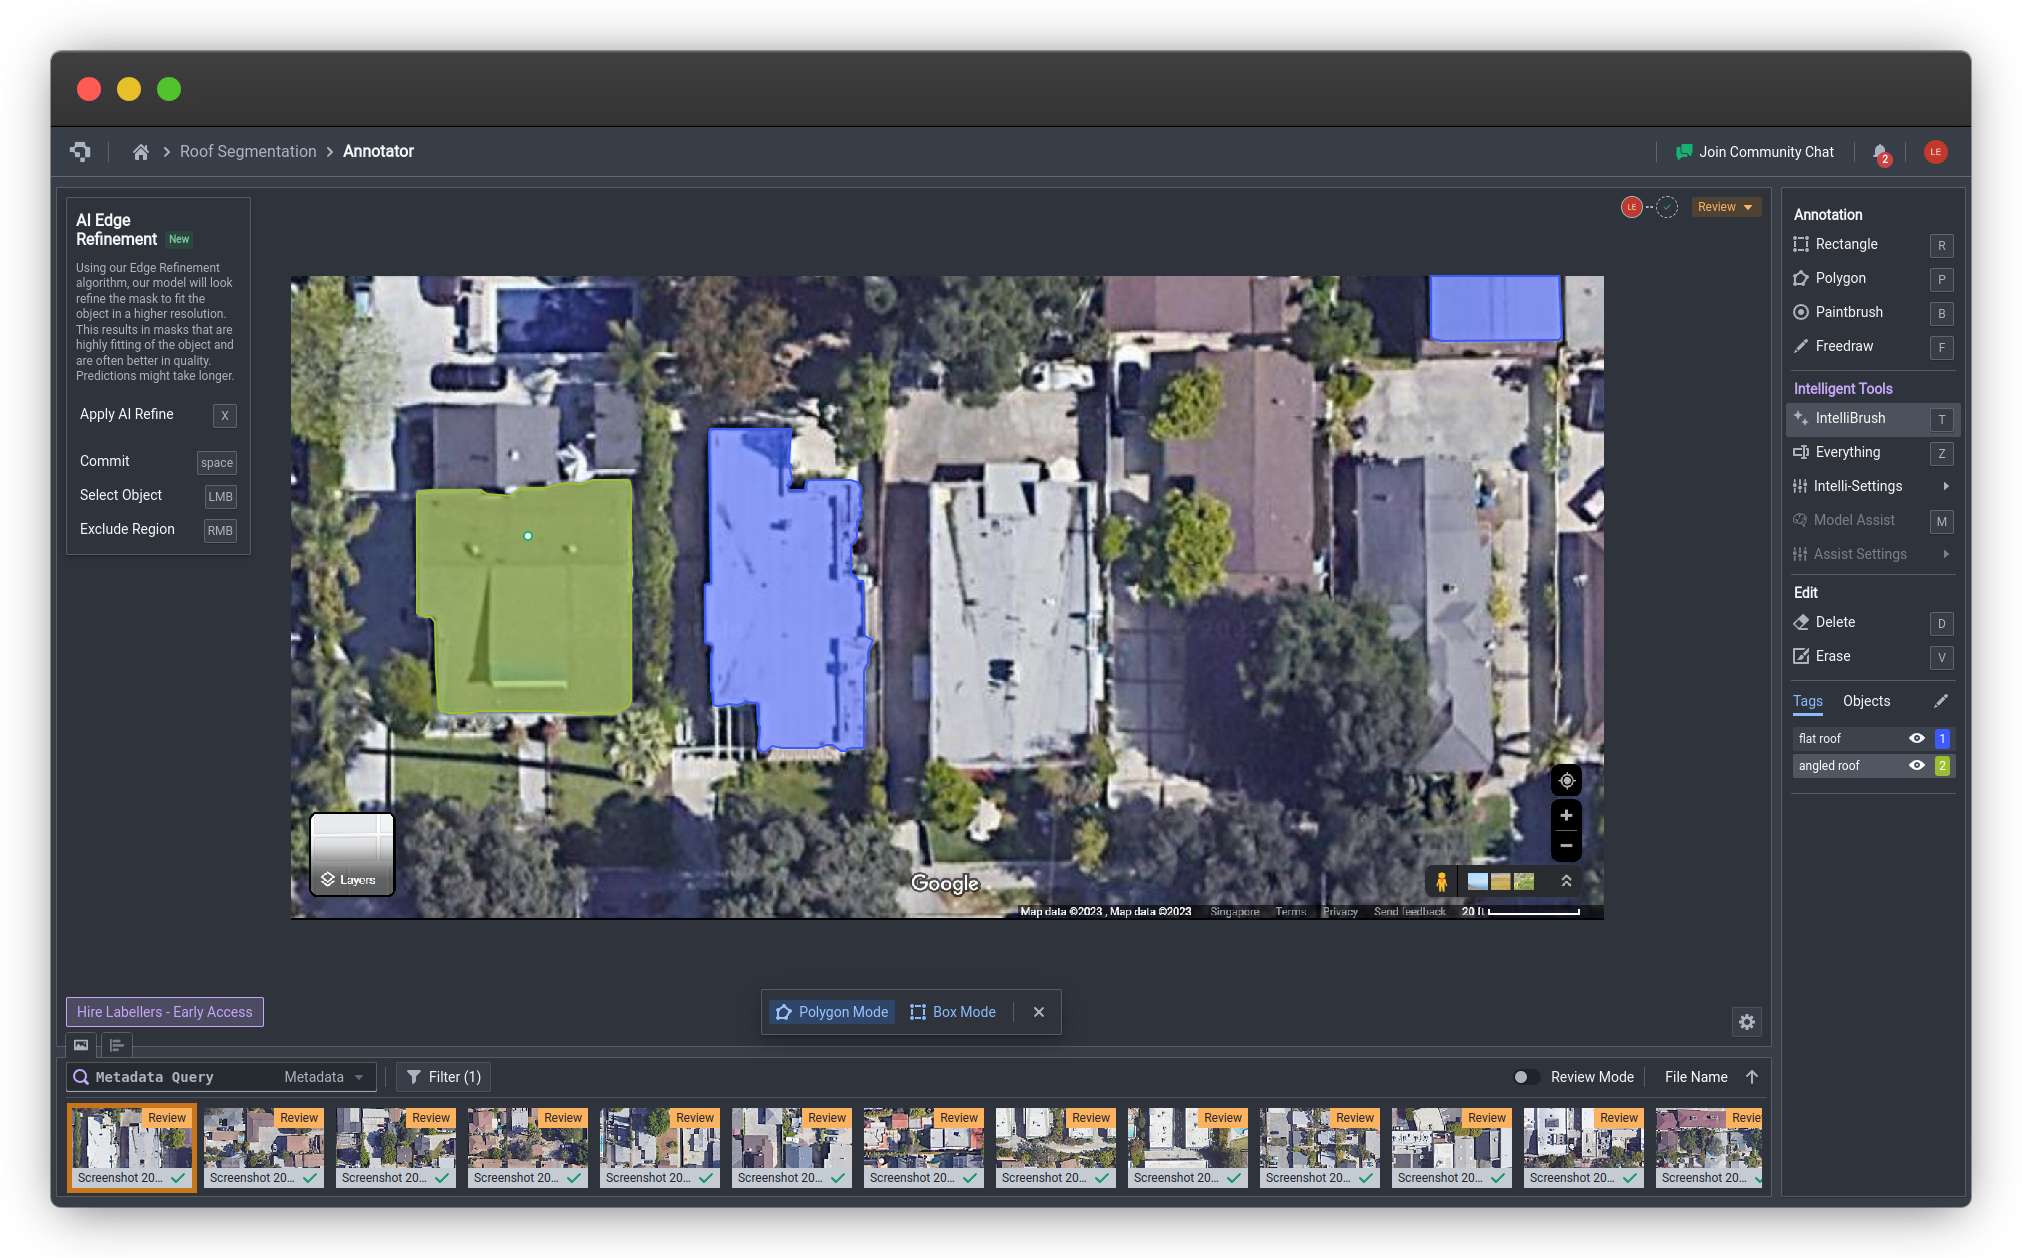
Example of IntelliBrush being used to automatically annotate polygons (click to enlarge)
Keypoint
Our users can use Datature's Annotator to create annotations on images that they have uploaded onto the platform. Keypoint annotations cannot be used for any other computer vision tasks besides keypoint detection. As keypoint annotations differ from other tasks, they also have their own unique workflow for annotation.
In addition to having to add class tags, users are also asked to create an associated skeleton using the Skeleton Editor. In the editor, users can assign a name to the skeleton, add keypoints and connect them with edges. Any graph can be drawn with the keypoints and edges, and there is no restriction on whether keypoints must be connected at all.
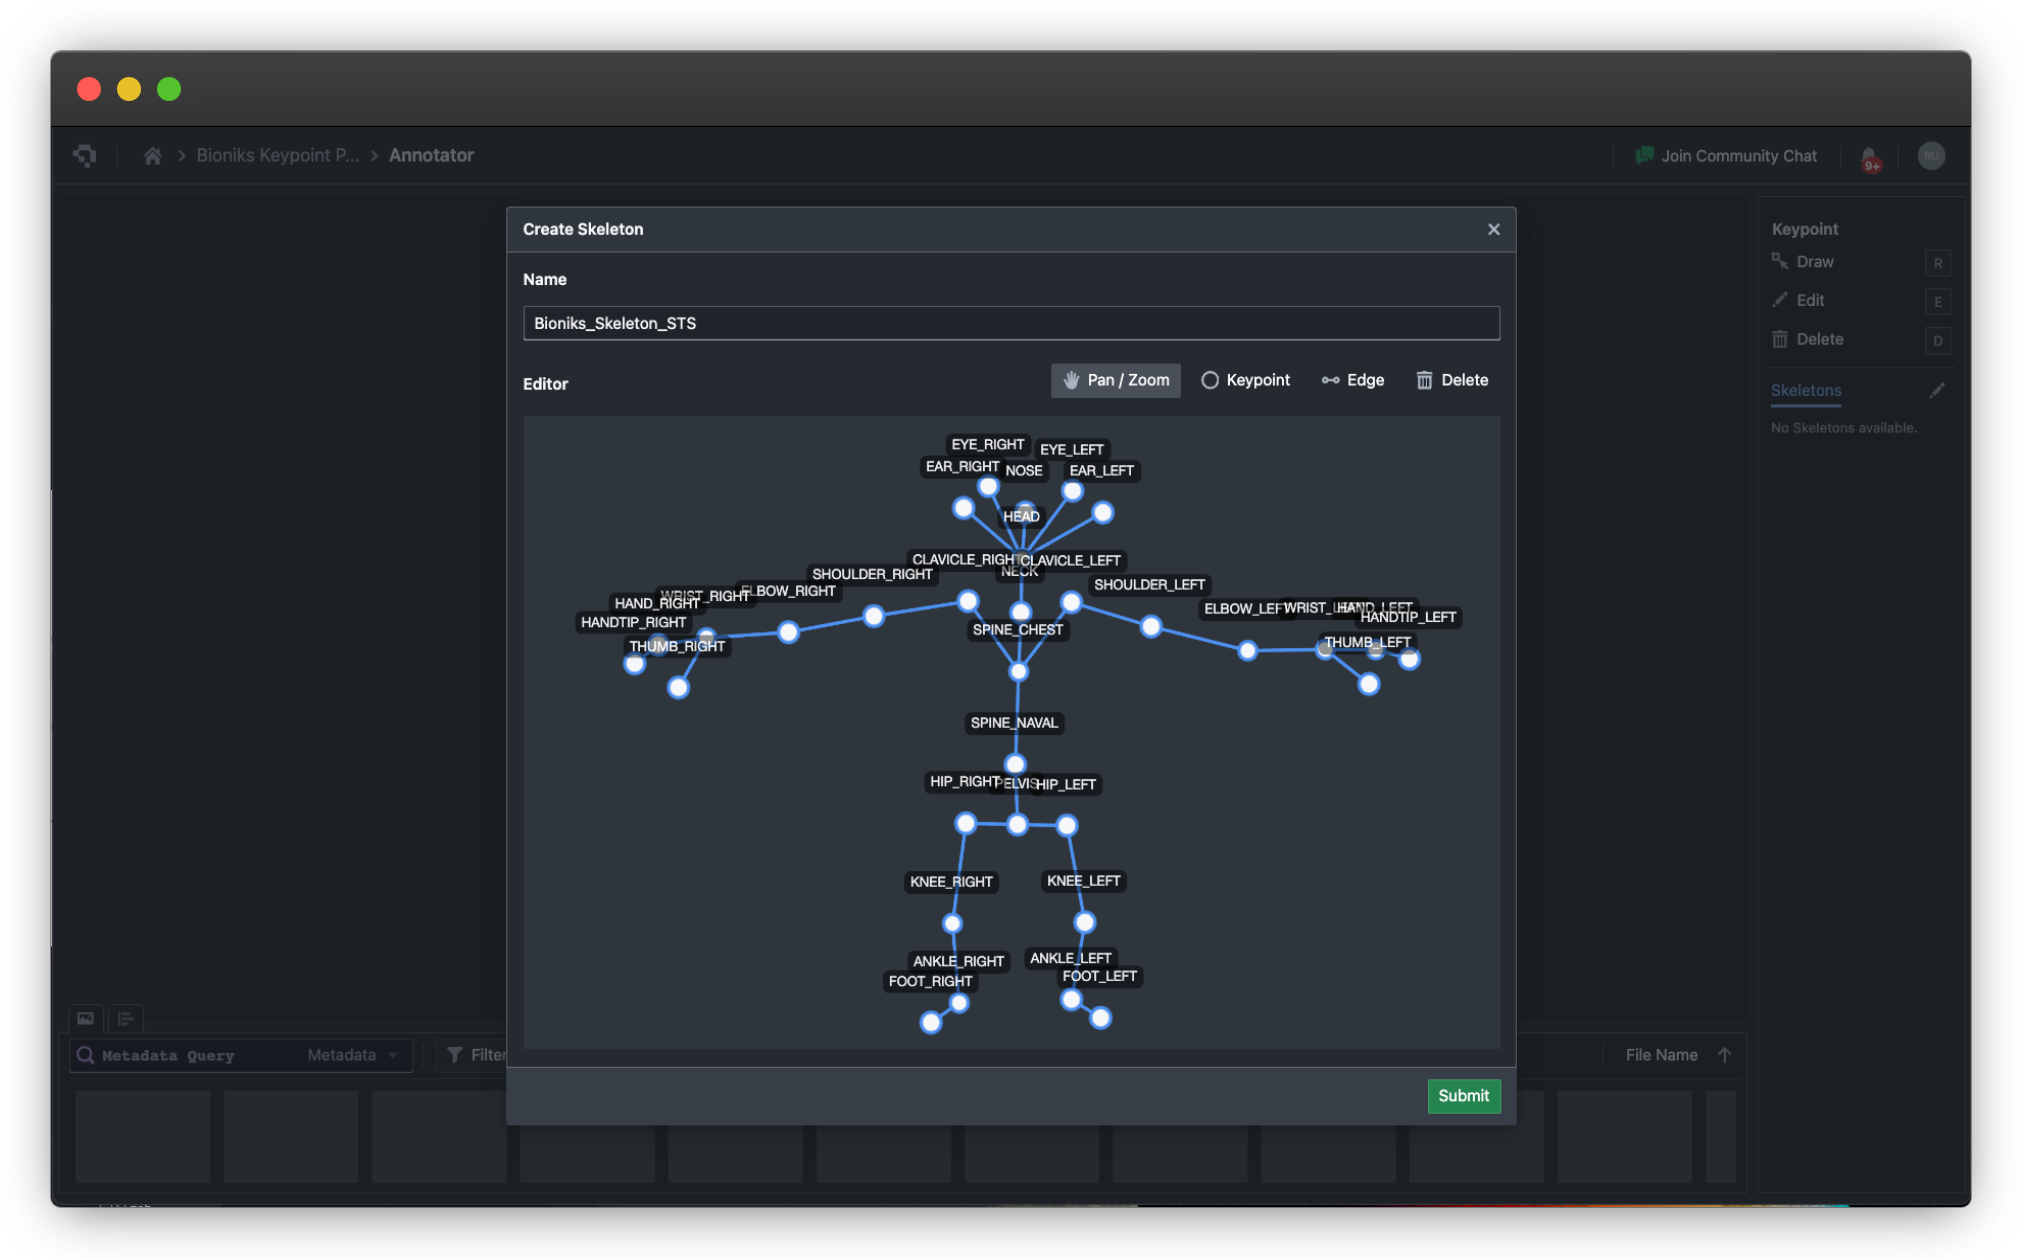
Example skeleton created in the Skeleton Editor (click to enlarge)
After the skeleton as been created, in the annotator, keypoint annotation involves selecting the class and its corresponding skeleton, which will then instantiate a new skeleton on the Annotator page, after which the points on the skeleton can be adjusted to the correct areas of the image, as shown below.
Keypoint skeleton annotation on an image (click to enlarge)
Common Questions
What are the different types of annotations?
We support a wide range of annotation modes, such as Bounding Box, Polygonal, and Paintbrush, so that our users can choose the annotation modes that are most suited for their projects. For a full list of annotation modes, check out Annotation Tools.
For a step-by-step guide on how to use our Annotator to create annotations for your images - reference Annotator Controls.
How do I get started with annotating?
To skip the guide and start annotating images for your project, simply click on Annotator in the left navigation bar of your project.
.png")
Project Home Page (Click image to enlarge)
The annotation page will look like the image below. If you have previously uploaded annotations, you will be able to see those annotations on this screen.
.png")
Annotator (Click image to enlarge)
You can also upload and export annotations in the Annotations tab from the main page. To see more about this, go to Uploading Annotations and Exporting Annotations.
.png")
Importing and Exporting Annotations (Click image to enlarge)
👋 Need help? Contact us via website or email
🚀 Join our Slack Community
💻 For more resources: Blog | GitHub | Tutorial Page
🛠️ Need Technical Assistance? Connect with Datature Experts or chat with us via the chat button below 👇
Updated 8 months ago