
Annotator
This section introduces the core layout of the Annotator and its functions.
Annotator Outline
The Annotator is divided into three main interaction sections for creating annotations.
-
Annotation Canvas
The canvas takes up the majority of the page, and contains the image to be annotated. Annotation functions such as creation and deletion are also performed on the canvas. -
Image Selector
The image selector essentially comprises thumbnails of the entire dataset, and allows you to select the image to perform annotation on. The image selector includes the following functions:- Selecting Specific Images
- Scrolling Through Images
- Filtering Annotated Images
- Toggling Annotation Opacity and Outline
- Changing Image Settings
-
Annotation Toolbar
The toolbar contains the functions that facilitate data annotation. These functions include:- Annotator: contains the various annotation tools, edit buttons for existing annotations, and tags and objects management tools
- Status: contains Review Mode which changes the status of the images, and Filter by Status
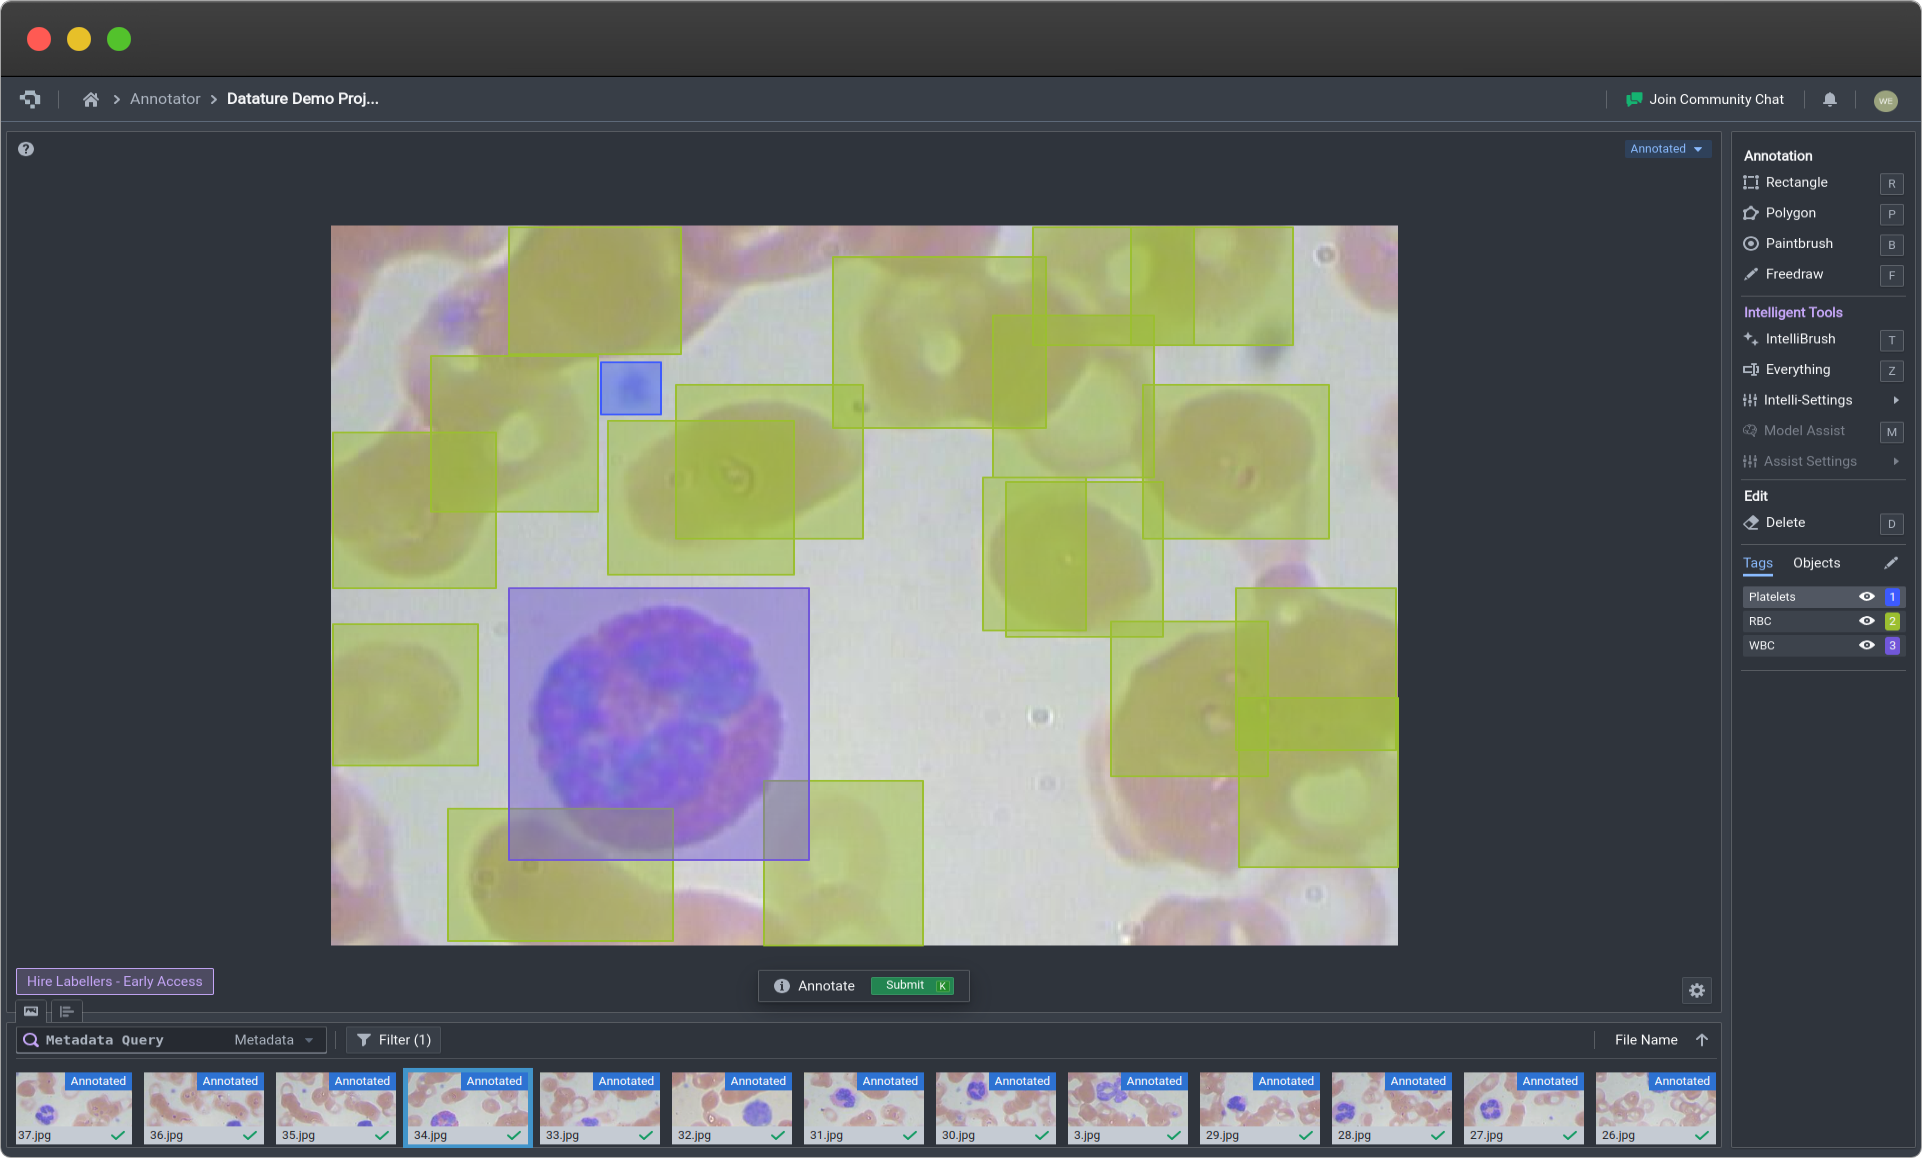
Canvas, Image Selector, and Toolbar (Click image to enlarge)
General Annotation Controls
Changing Tags
All newly created annotations will be tagged under the currently selected tag. You can change which tag the annotation is associated with by selecting the correct tag in the Annotation Toolbar.
Deleting Annotations
To delete an annotation, click on Delete on the toolbar (or using the keybind D) to enter delete-mode, then click on the intended annotation(s). esc exits delete-mode. Alternatively, you can right-click and select Delete to delete the annotation.
Editing Annotations
To change the tag of an annotation, perform right-click on the desired annotation and click on the current tag name. A list of other tag names will appear, and clicking on any of the tag names in the list will change the tag of the desired annotation.
Duplicating Annotations
To duplicate an annotation, right-click on the desired annotation directly and then select Duplicate. This will create another annotation of the same size next to the original annotation. This is currently supported for bounding boxes.
Subtracting Annotations
This tool is useful when you have overlapping annotations and you want to resolve them by removing the overlapping areas from a polygon such that there is no longer any overlap. Contexts in which this might be useful is for semantic segmentation, in which there can only be one ground-truth class for each pixel. To use the Subtract tool, right-click the first polygon whose shape you want to preserve, and then select the second polygon whose overlapping area will be removed. You will see the second polygon's shape alter to no longer have overlap.
👋 Need help? Contact us via website or email
🚀 Join our Slack Community
💻 For more resources: Blog | GitHub | Tutorial Page
🛠️ Need Technical Assistance? Connect with Datature Experts or chat with us via the chat button below 👇
Updated 10 months ago