
Annotations
Prerequisites
Before using the multi-planar annotation functionality, you must have:
- A DICOM or NIfTI file that has been extracted into the axial, sagittal, and coronal planes
- A project with type 'Medical 3D Detection'
How to Create Multi-Planar Annotations
To start annotating:
Activate the view
- Double click on the desired view (e.g., Axial, Coronal, or Sagittal) or select with the button (Refer to section ‘Activating View’ for more details)
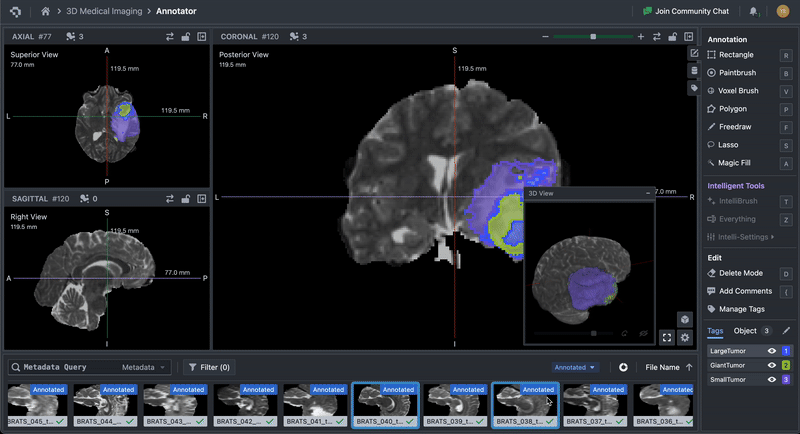
Navigate to the desired Slice/Layer
- Use the slice slider to locate the target slice or scroll while having the view unlocked (Or refer to the section ‘Slice Navigation’ for other methods)
- The current slice numbers are displayed in real-time for all views (e.g.,
77 (A), 134 (C), 120 (S)).
Create Annotations
- Selecting any annotation tool (e.g., Paintbrush or Polygon) will automatically lock the selected view. The lock icon appears on the view panel to indicate that it is now active for editing.
- While in a locked view, you can scroll with your mouse wheel or trackpad to zoom in and out.
- Draw or mark region of interest (ROIs) using the selected tool. For example:
- Use the Paintbrush for freehand segmentation.
- Use Magic Fill for AI-assisted automatic ROI detection.
- Once the slice is annotated, press space to confirm the annotation.
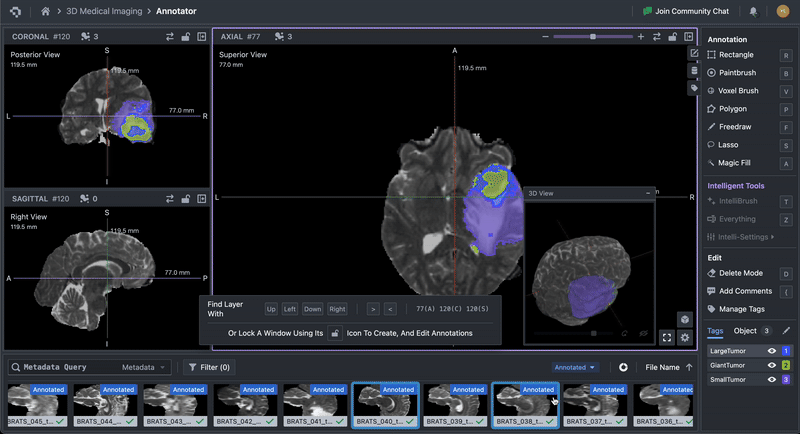
Continuing annotation on other slices
- To annotate additional slices:
- Use the top slider to navigate through the slices in a given plane. Use the
-and+to navigate through single slices at a time, or drag the slider to browse through slices.
Or Hold the ‘Shift’ key and scroll with your mouse wheel to navigate through slices in the activated view, without unlocking.
Or use<and>keyboard shortcuts to quickly navigate through slices within the current activated view.
- Use the top slider to navigate through the slices in a given plane. Use the

Using Annotation Tools
Datature’s MPR Annotator currently features 7 bitmask annotation tools:
- Rectangle Tool
- Paintbrush Tool
- Voxel Brush Tool
- Polygon Tool
- Freedraw Tool
- Lasso Tool
- Magic Fill Tool
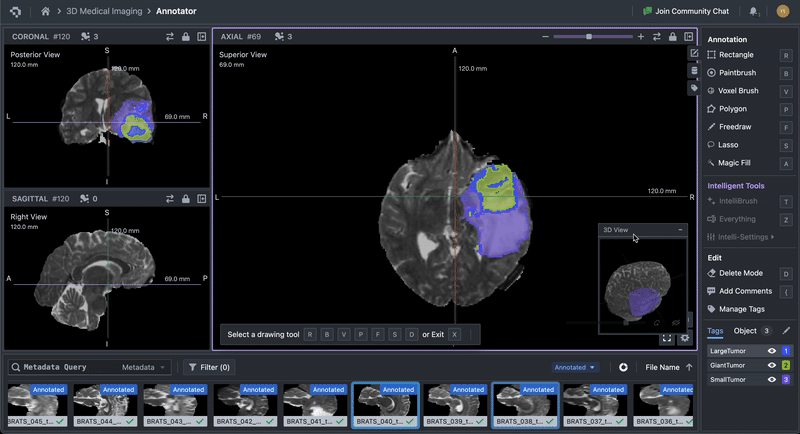
While each tool is unique, they are activated in much of the same way.
- First, you must lock your current slice in place either by selecting the lock icon in the top right corner of an activated view, or directly select a tool.
- If not yet selected, select a tool by clicking on the tool’s icon, or using the tool’s shortcut.
- Use your mouse or trackpad to interact with the tool and begin creating an annotation.
- During this time, you can navigate to other slices and annotate on those slices before committing an annotation, which links the annotation across slices.
- Commit your annotation by using the space bar.
- Note that the rectangle tool automatically commits as the left-mouse button is unclicked.
Rectangle Tool
Creates a rectangle or bounding box, on a given slice of a volume, around the desired annotation.

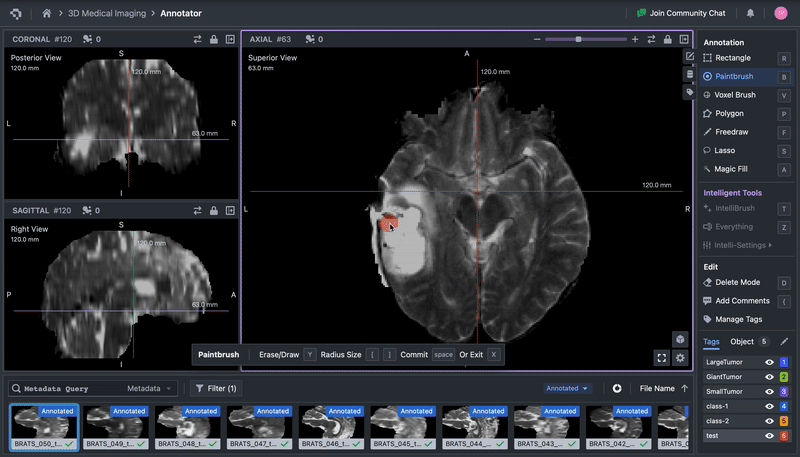
Paintbrush Tool
Creates a polygon, on a given slice of a volume, via “painting”.
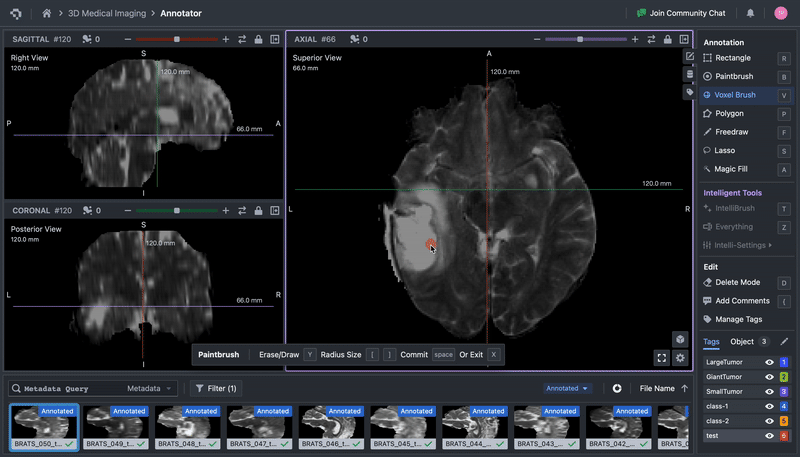
Voxel Brush Tool
The Voxel Brush tool is unique in its ability to annotate multiple slices with a single brush stroke. This is because instead of the 2D Paintbrush tool painting with a “pixelated circle”, the Voxel Brush Tool paints with a “voxel sphere”.
Thus, the Voxel Brush Tool creates a 3D polygon, on neighboring slices of a volume, via “painting”.
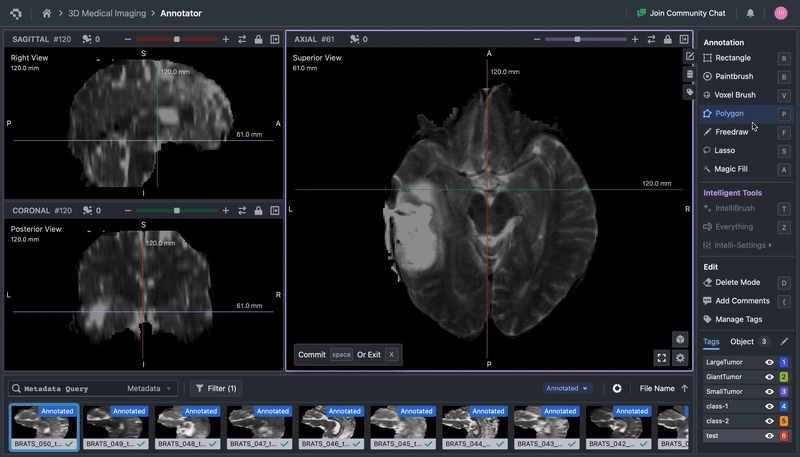
Polygon Tool
Creates a polygon, on a given slice of a volume, using user-placed vertices, which are then connected via edges between subsequently placed vertices.
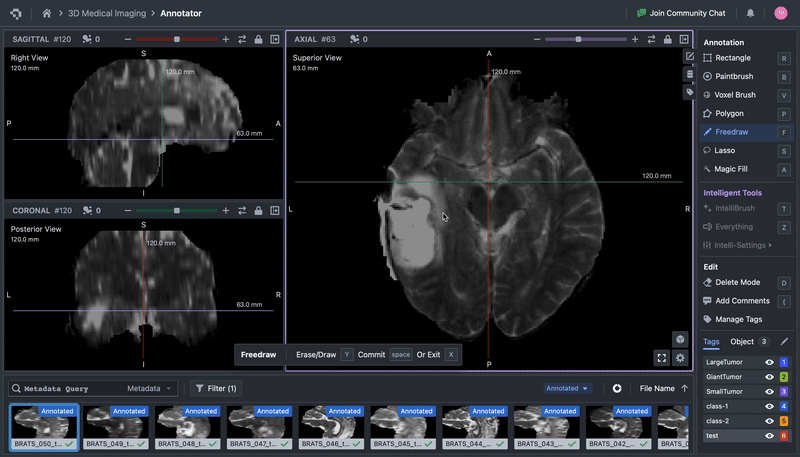
Freedraw Tool
Creates a polygon, on a given slice of a volume, using a path drawn by the user. If the path is not closed, an edge between the starting vertex and ending vertex is used to close the path.
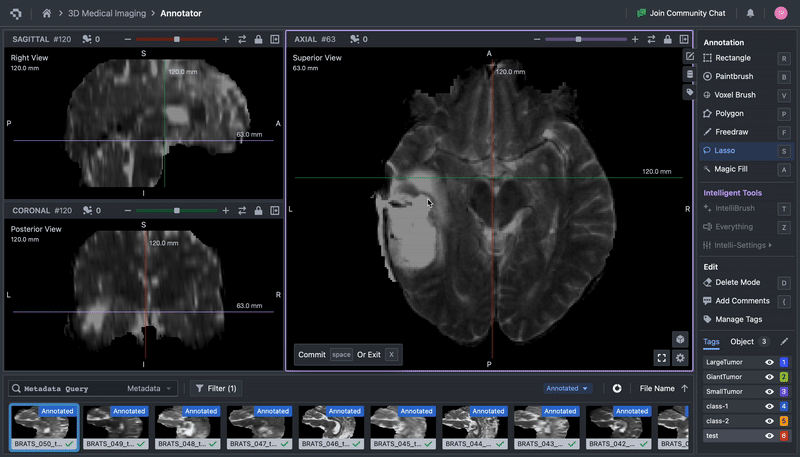
Lasso Tool
Creates a polygon, on a given slice of a volume, using user-placed vertices and AI-aided edge-detection.
In Settings, you can change the “Lasso Prediction Range” to modify the pixel-range of the segmentation prediction.
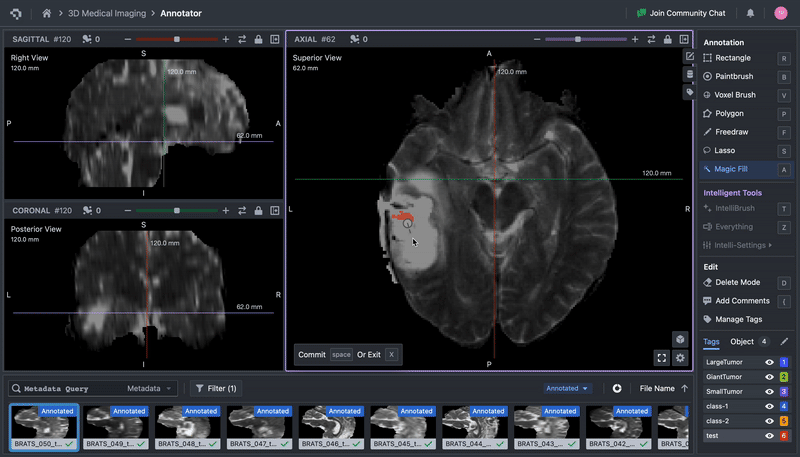
Magic Fill Tool
Creates a polygon, on a given slice of a volume, using a user’s click and drag to predict a segmentation mask.
In Settings, you can increase, or decrease, the “Magic Fill Cleanup Threshold” so that the “fill holes” suggestion applies to holes of increasing, or decreasing size.
👋 Need help? Contact us via website or email
🚀 Join our Slack Community
💻 For more resources: Blog | GitHub | Tutorial Page
🛠️ Need Technical Assistance? Connect with Datature Experts or chat with us via the chat button below 👇
Updated 10 months ago