
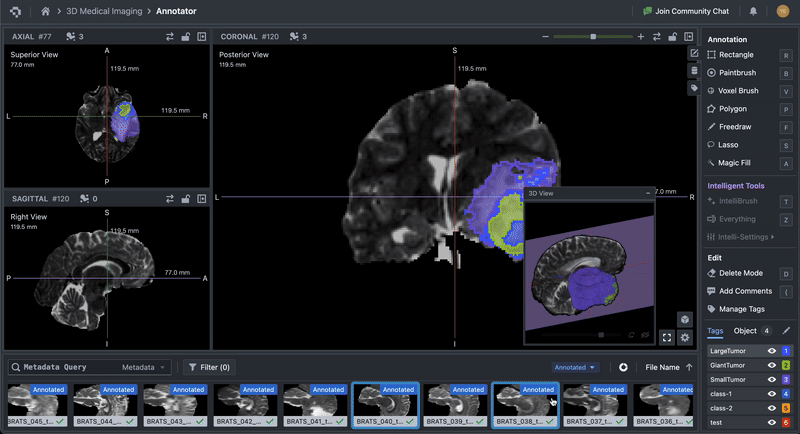
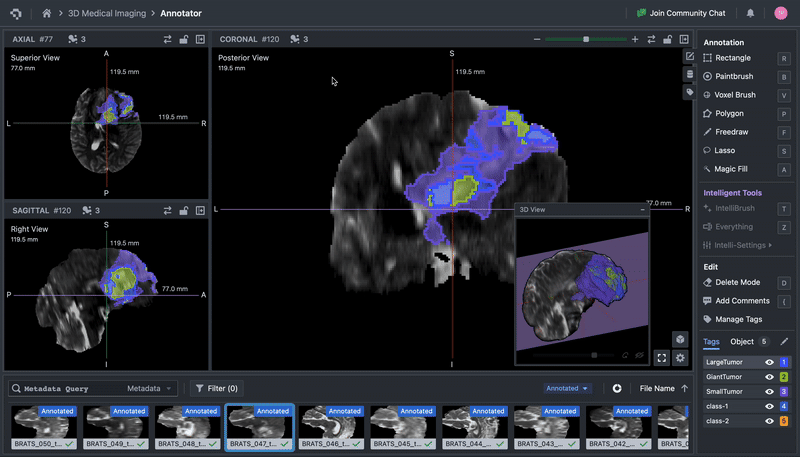
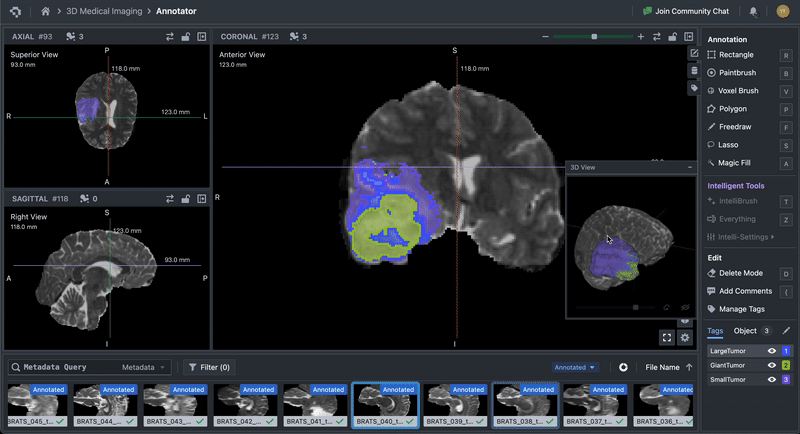
Views
Datature’s platform employs a multi-view visualization architecture that displays medical image data in standard anatomical planes. Each view represents a different cross-sectional plane through volumetric data.
Datature’s Multi-planar Annotator provides three default slice views representing the standard anatomical planes:
Types of View
Coronal View
The Coronal view, also known as the “frontal” view, divides the volume into anterior (front) and posterior (back) sections. This view is often used to demonstrate superior-inferior and left-right anatomical relationships.
Axial View
The Axial view divides the volume into superior (top) and inferior (bottom) sections. This view is often used to demonstrate posterior-anterior and left-right anatomical relationships.
Sagittal View
The Sagittal view divides the body into left and right sections. Similar to the Coronal view, this view is often used to demonstrate superior-inferior anatomical relationships. Additionally, similar to the Axial view, the Sagittal view demonstrates posterior-anterior anatomical relationships from an alternative perspective.
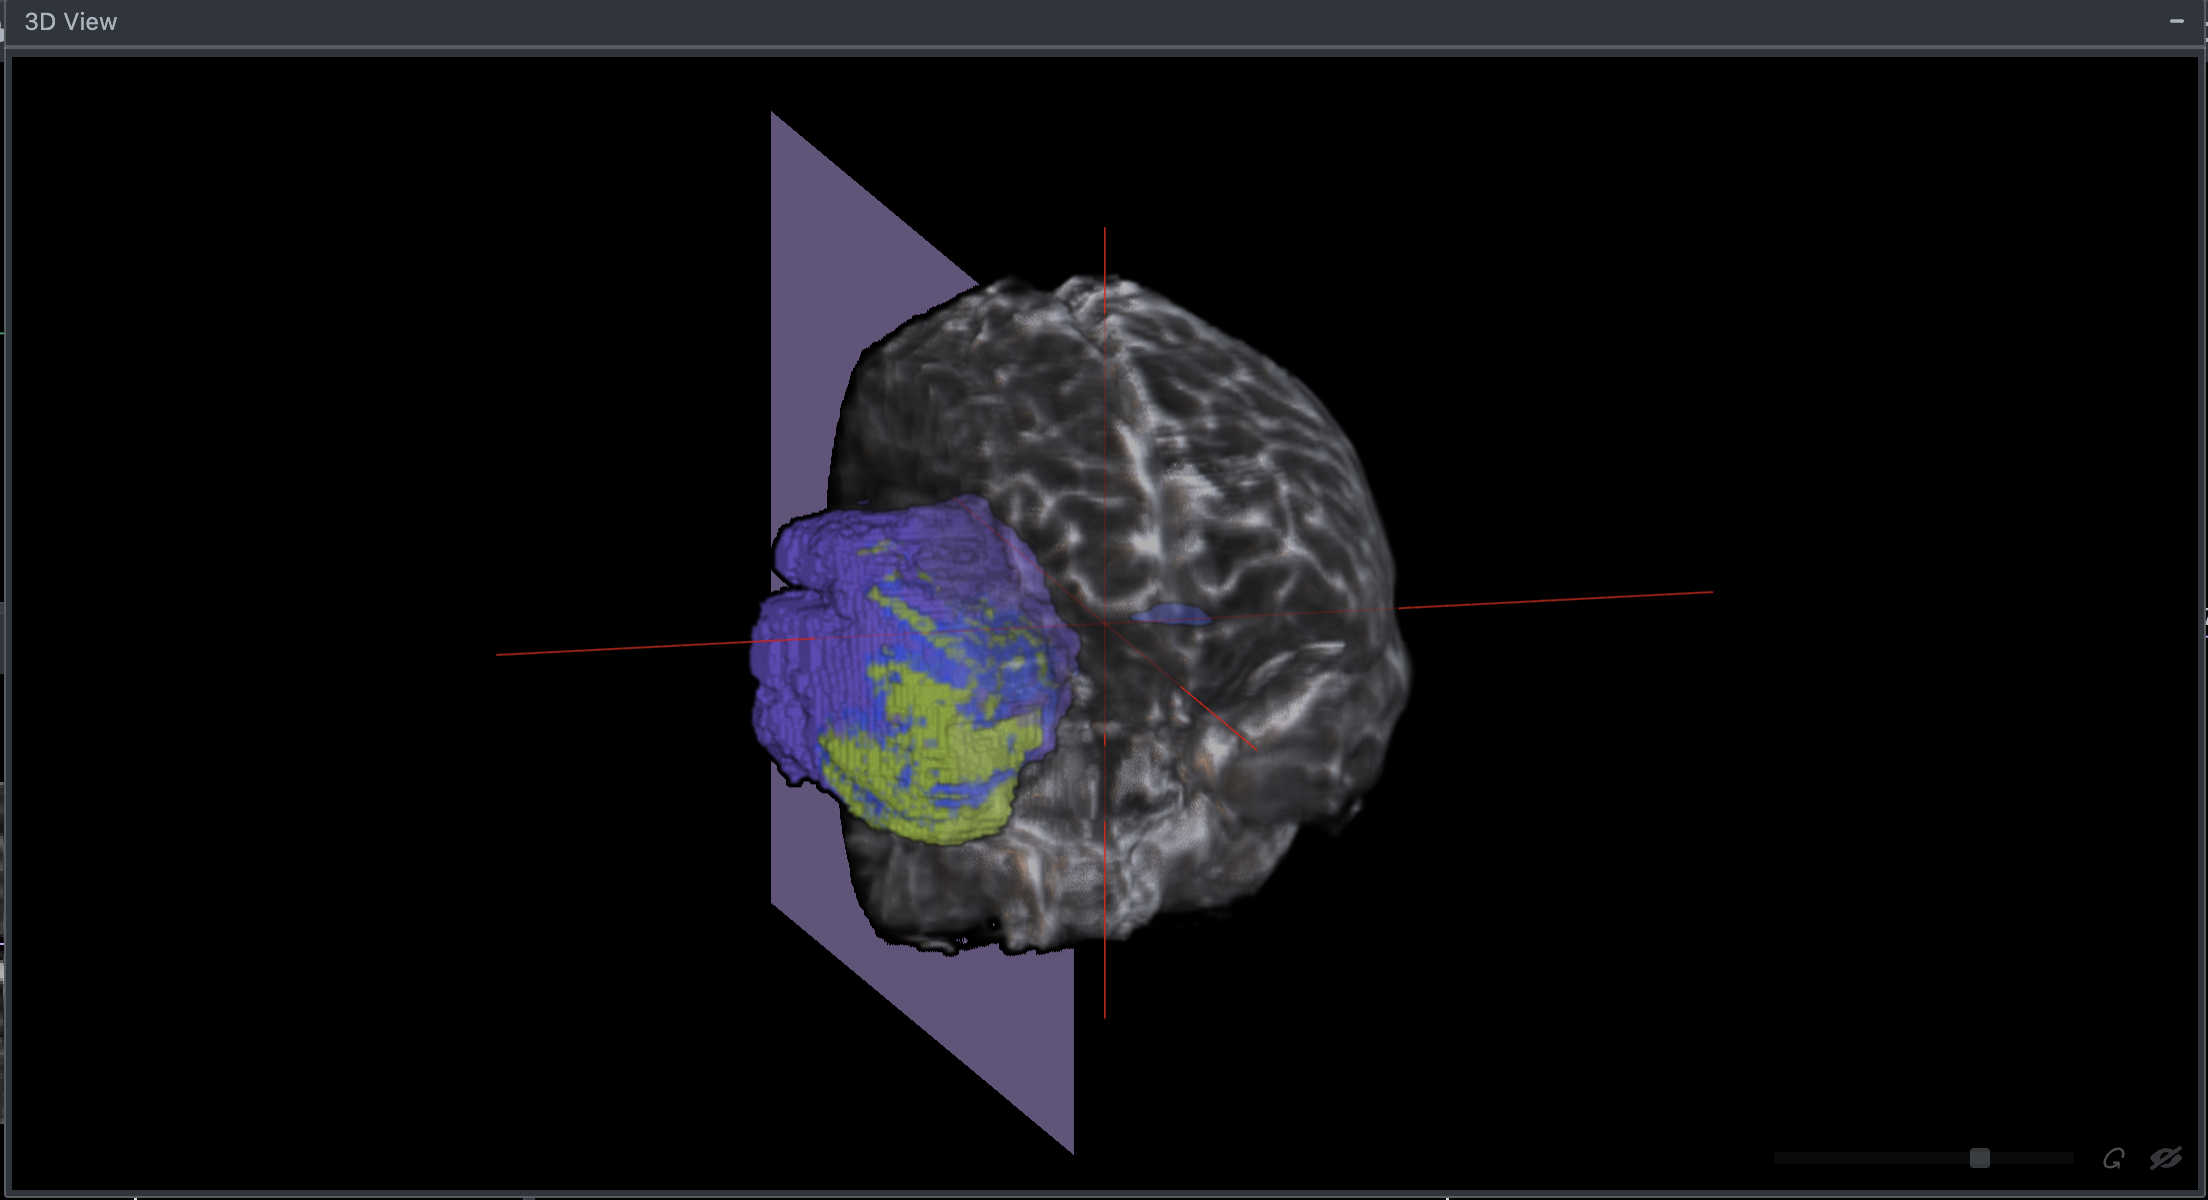
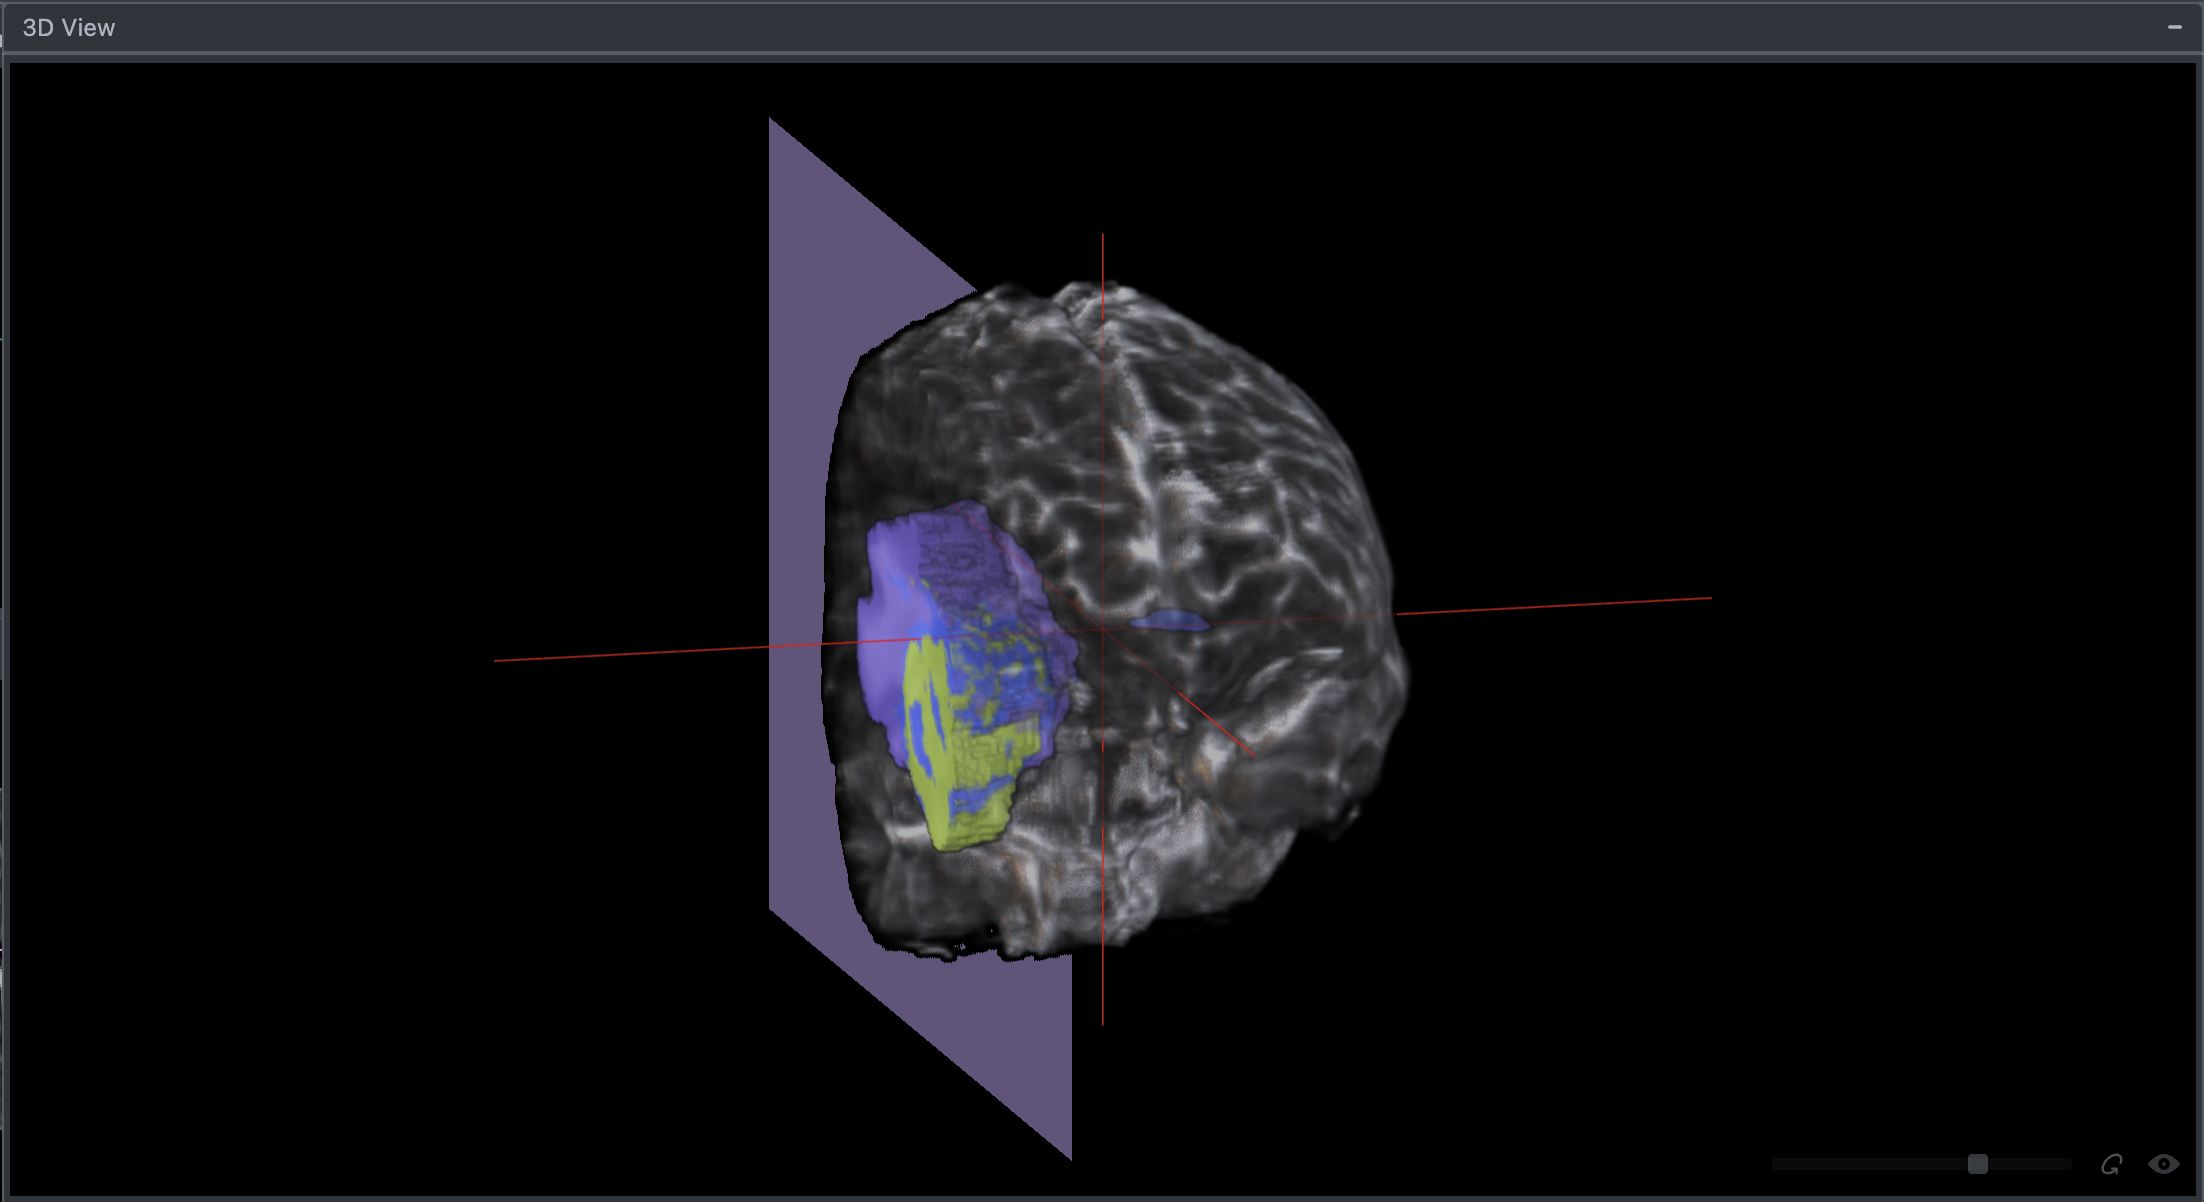
3D View
3D View will render a multi-planar reconstruction of the given volume and all of its annotations, providing a 3D-rendered perspective of the entire volume.
- 3D View window: Resize the 3D View window as needed by clicking and dragging from the window borders.
- Zoom In/Out: Press ‘Shift’ button on your keyboard and scroll your mouse wheel
- Ground Truth Layer Opacity: Use the sliding bar in the bottom-right corner of the 3D View window to adjust the opacity of the Ground Truth later relative to the annotation objects
- Align Clip Plane: Switch between aligning the volume clip plane with the axial, coronal or sagittal view. Alternatively, render the 3 MRP planes instead of clipped volume.
- Toggle Clip Plane Alignment: Use the Clip Plane toggle (eye/no-eye icon) to control whether the annotation layers are clipped along with the "Ground Truth Layer". When the toggle is on (eye icon), the Clip Plane will clip both the "Ground Truth Layer" and the annotation layers, revealing internal annotations. When the toggle is off (no-eye icon), the Clip Plane will only clip the "Ground Truth Layer", while the annotation layers remain unclipped.
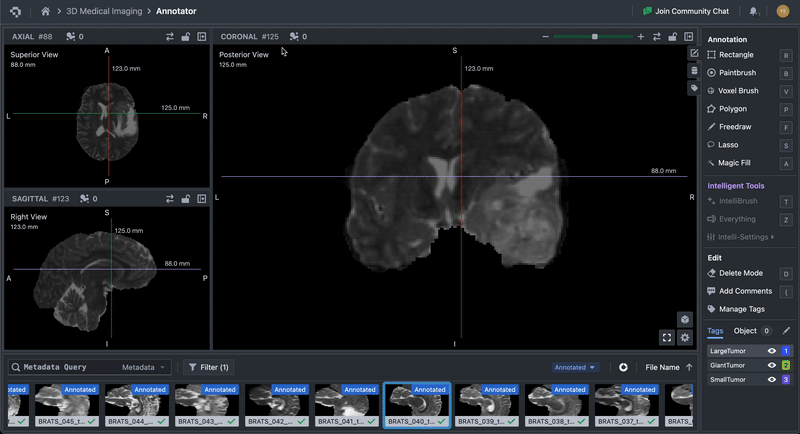
Views Management
Activating Active Views
The purple box indicates the active session of the selected view. You can activate any view by:
-
Double-clicking on its panel
-
Click on the button in respective plane for intended views

-
Hot key: Pressing keyboard ‘Ctrl’ key followed by respective preferred views ‘A’ for Axial View, ‘S’ for Sagittal, ‘C’ for Coronal.
-
Multi-View Layouts: The platform supports combined layouts (e.g., three-plane plus 3D view). Users can toggle between these layouts using toolbar buttons or keyboard shortcuts. Moreover, users can resize views by clicking and dragging their borders, as well as rearrange views by dragging a view’s header to a desired location.
Flipping within each view:
Click on the button below on respective view to flip the view direction (Example, switching from posterior to anterior view)

Slice Navigation
Slice navigation is supported through various input methods:
- Mouse Wheel: Scroll up/down within a view to move through slices.
- Keyboard Shortcuts: Use arrow keys for precise slice control.
- Slider Tool: Adjust the position of a slice using the slider tool at the top of each view panel.

- Crosshair Dragging: Move the crosshair in one view to update slices across all synchronized views.

Note:Whenever an annotation tool is selected, the corresponding view automatically locks and activates to ensure focus and prevent accidental changes. Locked view will activate the functionality to zoom in and out.
👋 Need help? Contact us via website or email
🚀 Join our Slack Community
💻 For more resources: Blog | GitHub | Tutorial Page
🛠️ Need Technical Assistance? Connect with Datature Experts or chat with us via the chat button below 👇
Updated 11 months ago